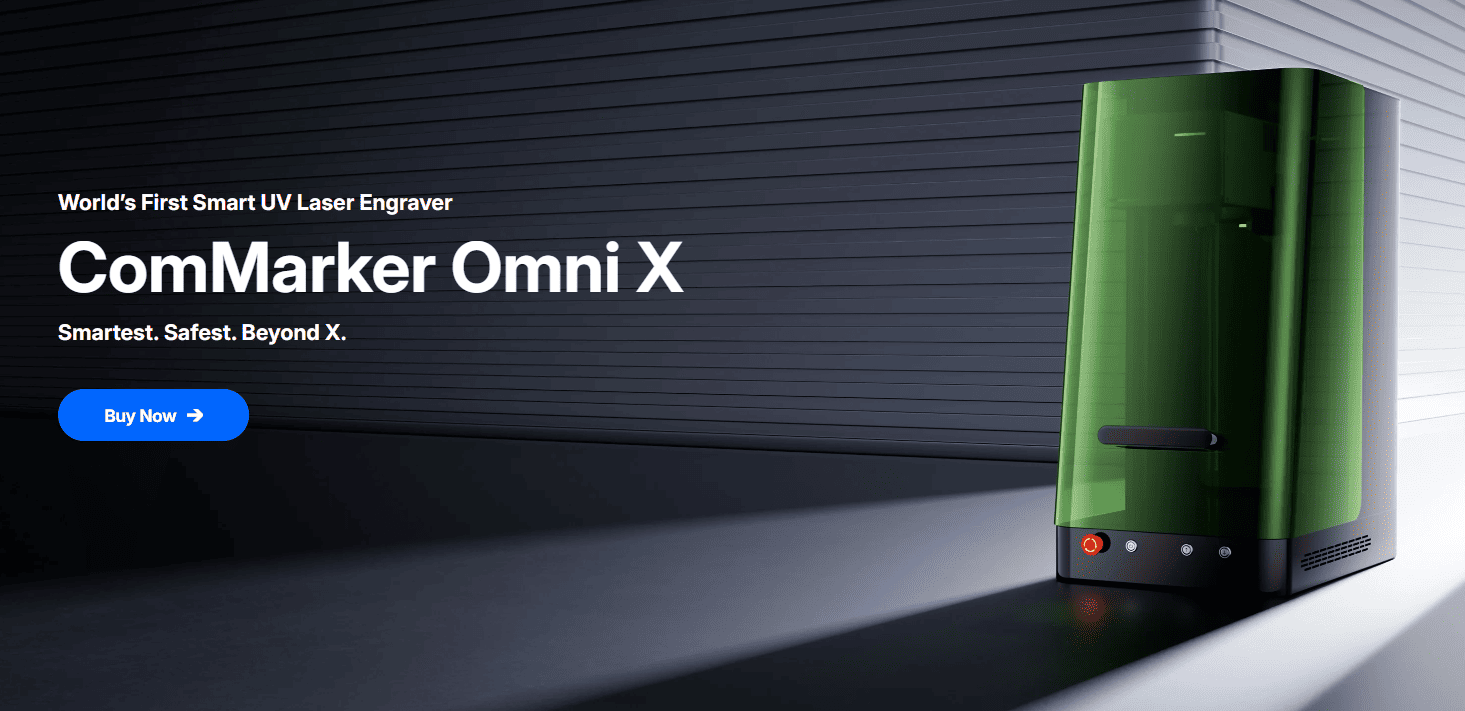
The ComMarker Omni X/XE UV laser engraver is a powerful tool that allows users to create 3D engravings on glass spheres, including crystal balls. Whether you are a hobbyist looking to create personalized gifts or a business owner offering unique customized items, the Omni X/XE delivers professional-grade results. In this guide, we’ll walk you through the process of engraving 3D designs onto crystal balls using the ComMarker Omni X/XE, ensuring a seamless and precise result every time.
Step-by-Step Process for Engraving 3D Glass Designs on Crystal Balls
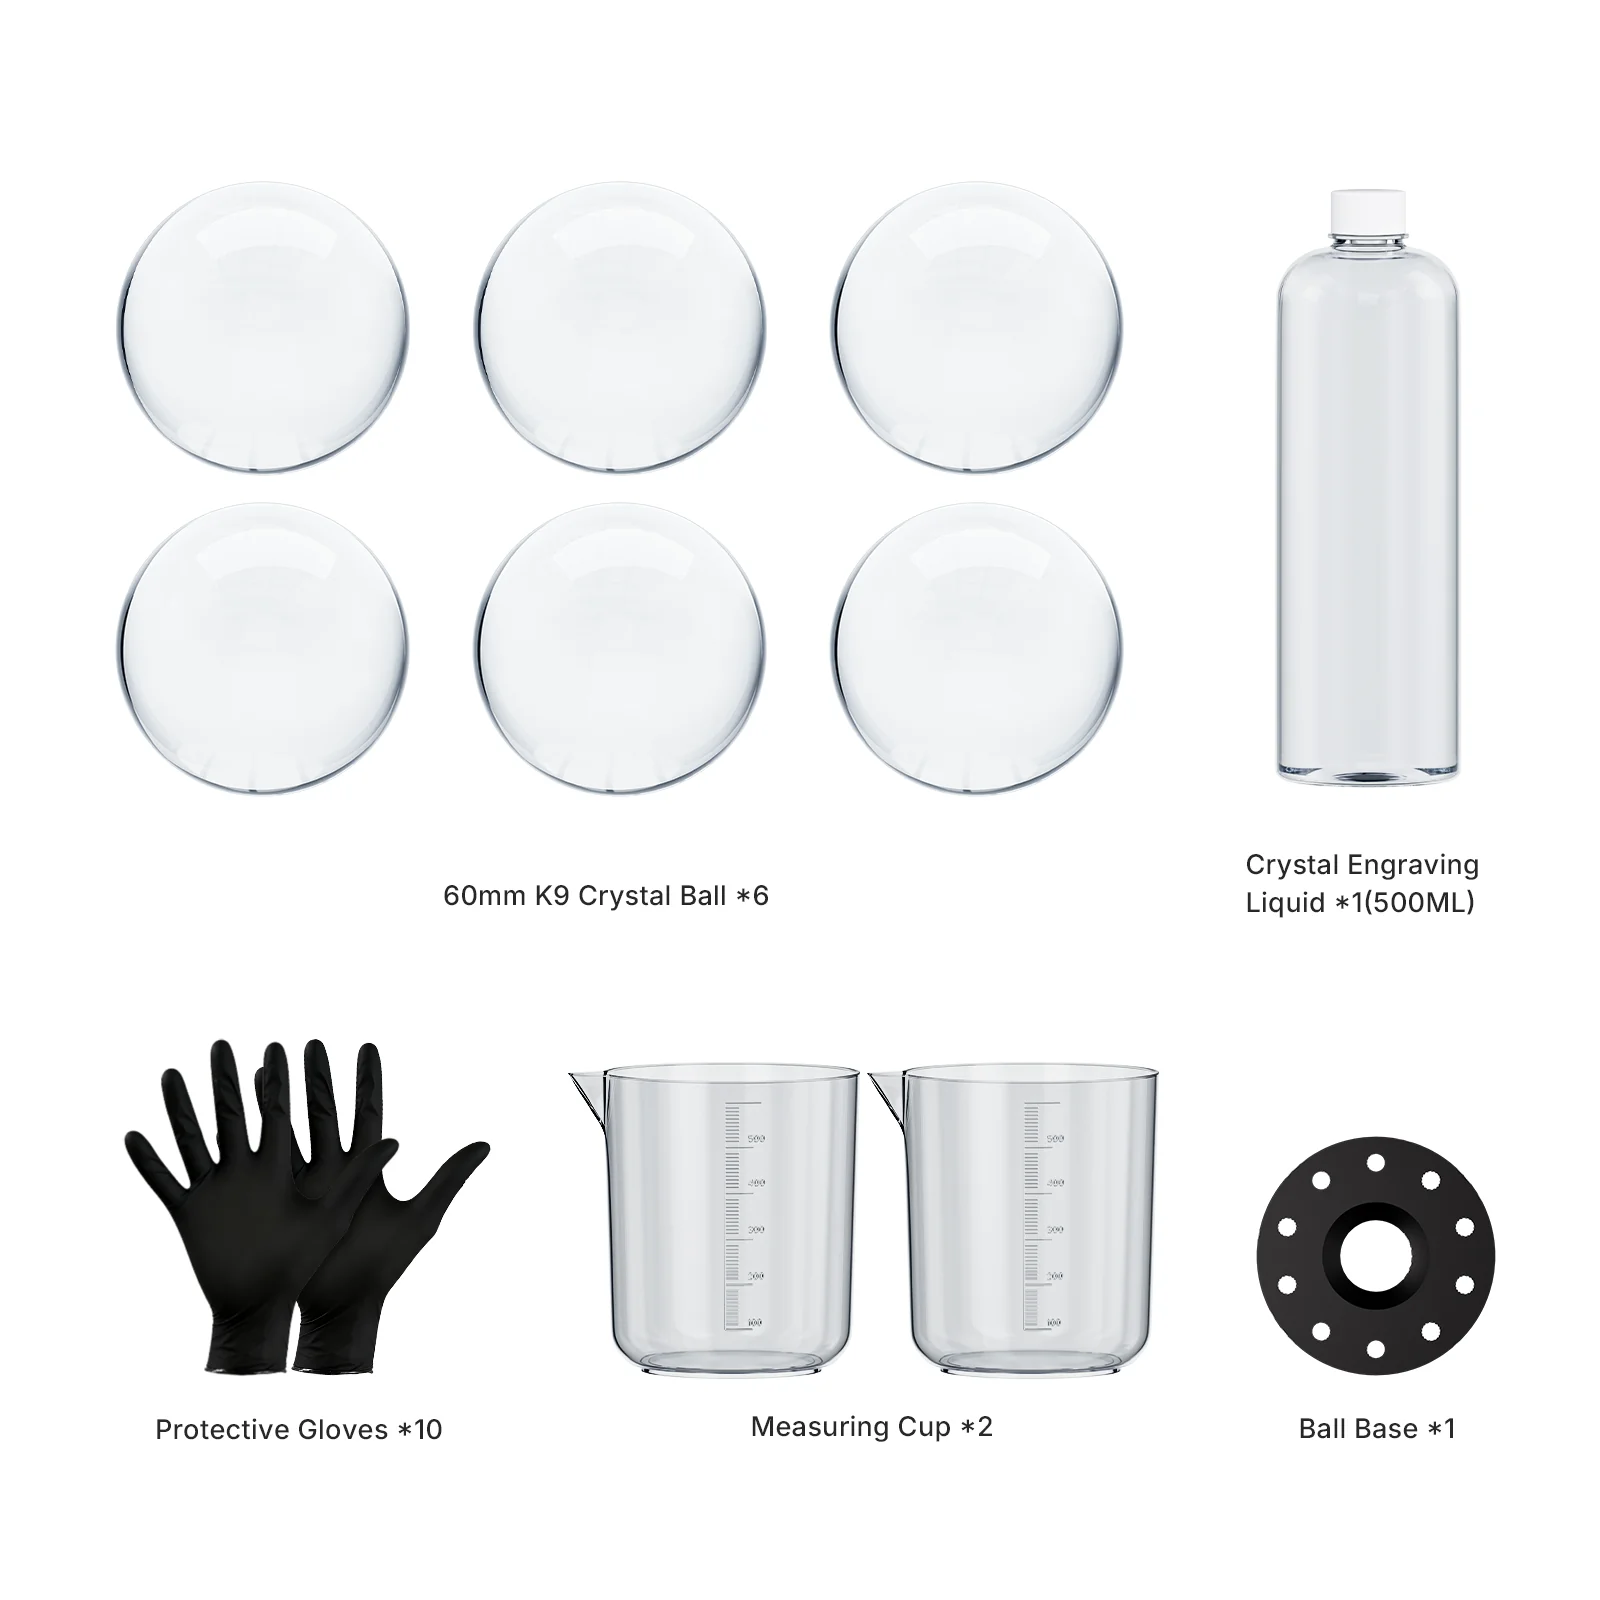
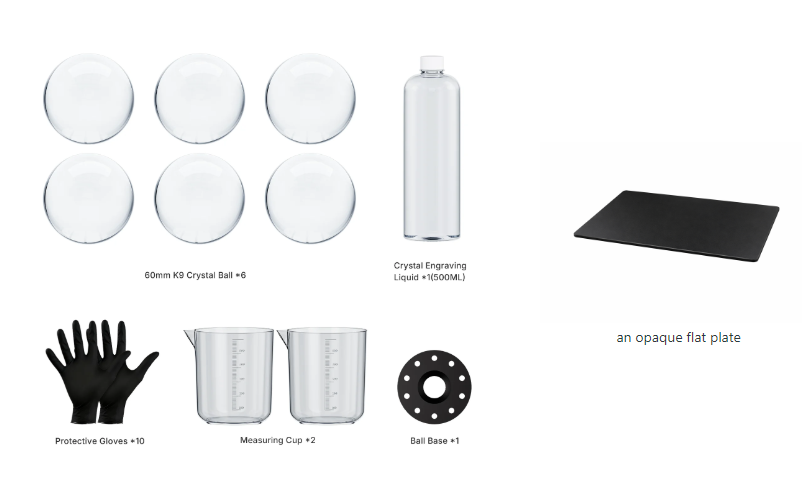
1. Prepare the Required Materials
Before you begin engraving, gather all the necessary materials and ensure everything is set up correctly. You’ll need the following:
-
ComMarker Omni X/XE UV Laser Engraver
-
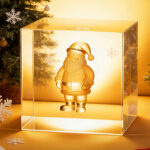
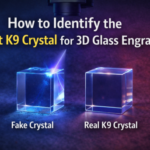
Crystal Balls/Spheres (from the ComMarker K9 Crystal Ball Kit) https://store.commarker.com/products/k9-crystal-ball-kit-6pcs?_pos=4&_fid=1014a5742&_ss=c
-
Engraving Oil
-
Protective Gloves
-
Measuring Cup and Ball Base
-
Opaque Flat Plate (for preview alignment)
-
Software: ComMarker Studio
Important Note: Ensure your computer is active throughout the engraving process to avoid interruptions, and disable sleep settings on your screen.
2. Set Up the Machine and Lens
-
Mount the 70x70mm field lens onto the engraver.
-
Open ComMarker Studio software, and select the corresponding lens setting in the software.
-
Power on the engraver and remove the lens cap to ensure it’s ready for use.
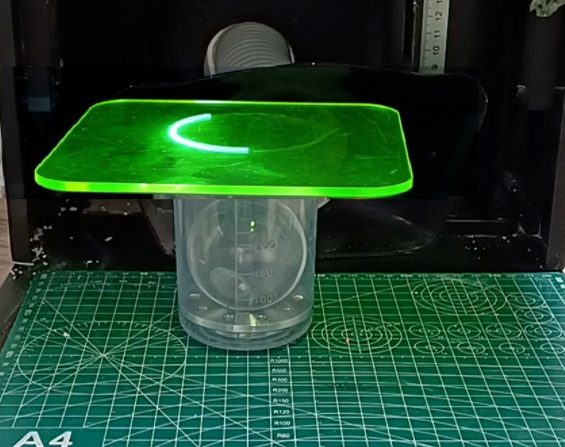
3. Align the Crystal Ball and Preview
-
Place the ball base into the measuring cup and carefully position the crystal ball onto it.
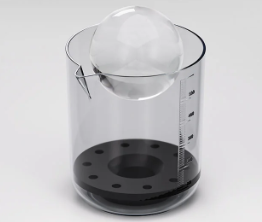
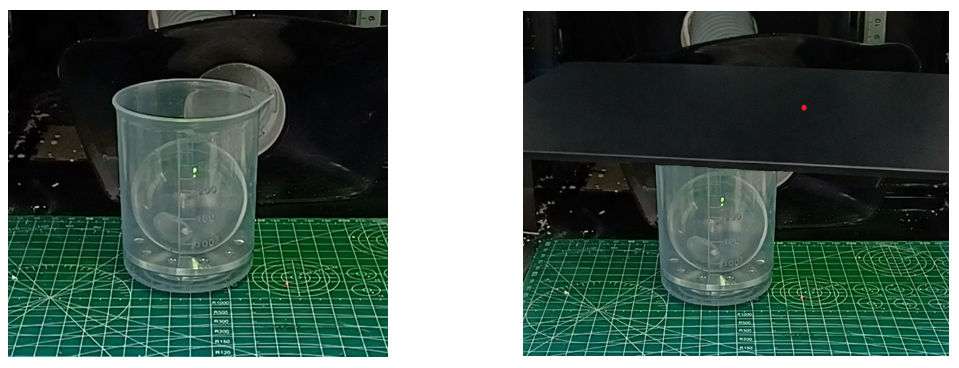
-
Put the measuring cup on the engraving bed and cover it with the opaque flat plate. Ensure that the red dot is positioned correctly on the plate surface.
-
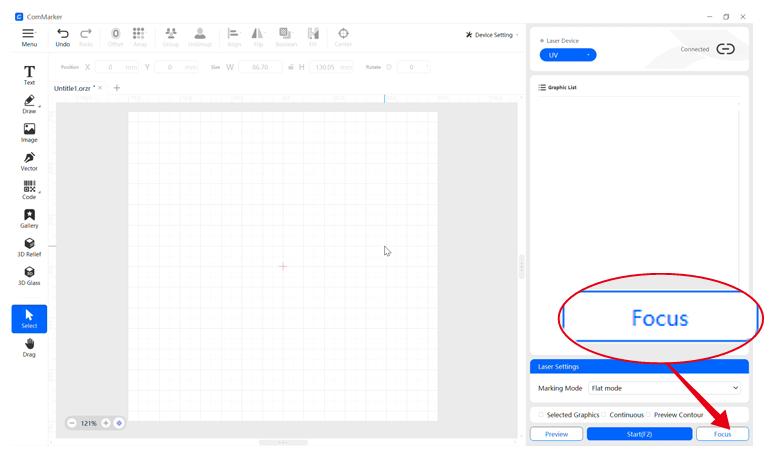
Click the “Focus” button in ComMarker Studio to start the autofocus function.
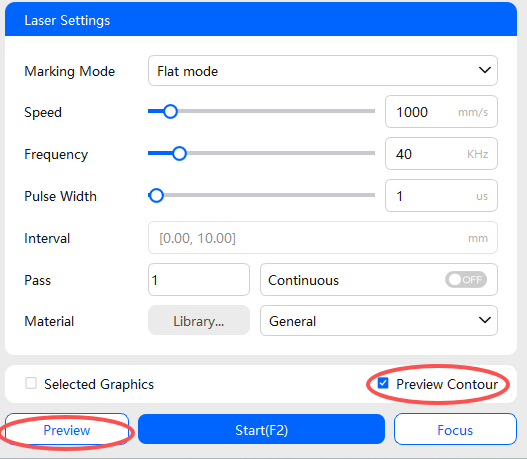
4. Create and Adjust the Engraving Design
-
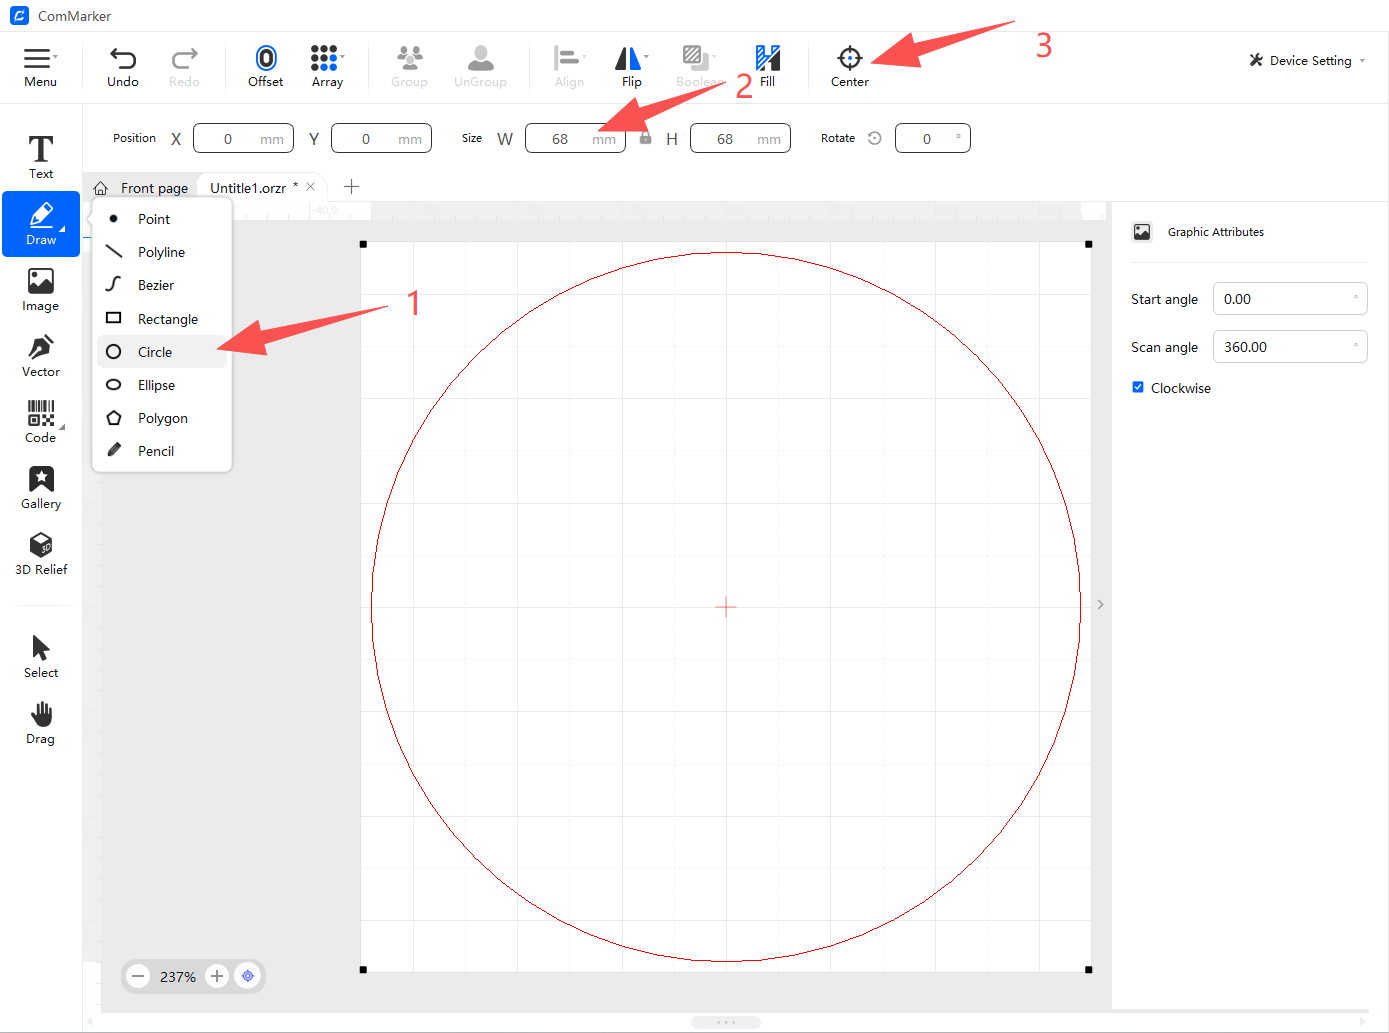
Use the “Draw” tool to create a 68 mm circle (The diameter of the measuring cup) on your design interface and click “Center.”
-
Once you’ve set the circle, click the “Preview Contour” and then the “Preview” button to visualize how the engraving will appear on the crystal ball.
-
After previewing, remove the flat plate. Align the preview circle with the edge of the measuring cup using the preview helper tool.
Important: Ensure the alignment is perfect before starting the engraving process. Do not move the crystal ball or measuring cup once aligned.
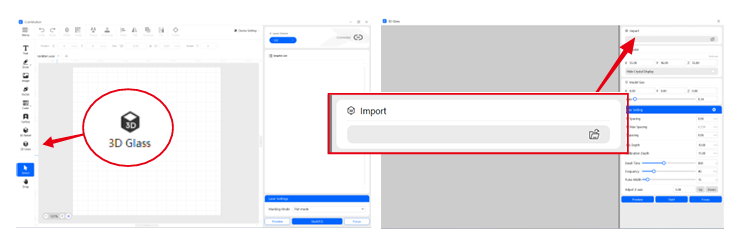
5. Import Your 3D Model for Engraving
Open the “3D Glass” module in ComMarker Studio and import your 3D model (STL, OBJ, or GLB file format) by clicking “Import.”
-
STL files are simple and easy to process, but provide less detailed engravings.
-
OBJ files are great for higher-quality engravings with richer details.
-
GLB files include geometry, textures, and materials, making them ideal for detailed glass engraving.
If you’re unsure which file type to use, STL is usually the safest choice for beginners.
6. Ensure the red dot is on the engraving bed. Click Focus.
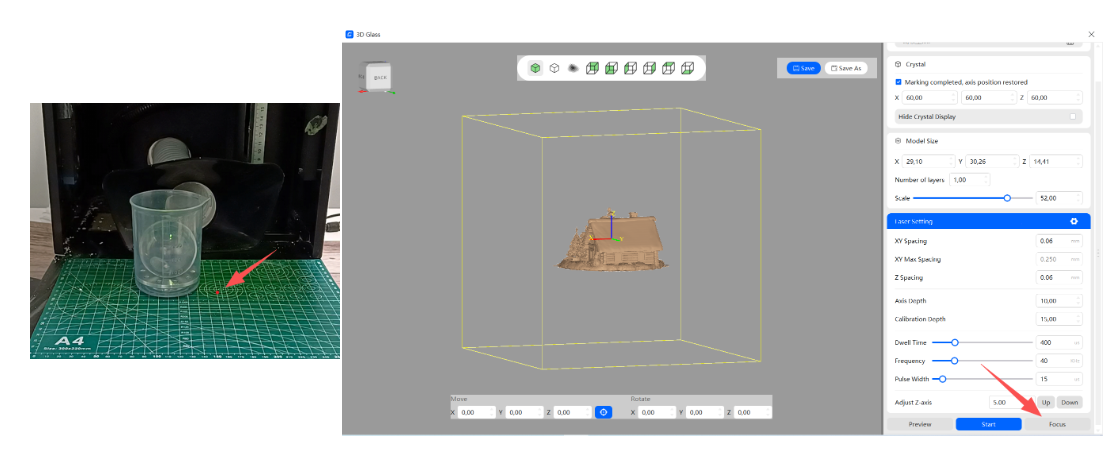
7. Use the Adjust Z-axis function to raise the laser head by 12mm.
Why the Z-axis needs to be adjusted and how much to move
The sphere is placed on a ball base inside a cup, positioning it above the engraving bed, while the bed recess lowers the sphere’s bottom relative to the bed surface.After autofocus on the engraving bed, raise the laser head so the focal point aligns with the lowest point of the sphere.
Reference values: (using our official 15 mm ball base) 50 mm → 10 mm, 55 mm → 11 mm, 60 mm → 12 mm, 65 mm → 12 mm, 70 mm → 13 mm.

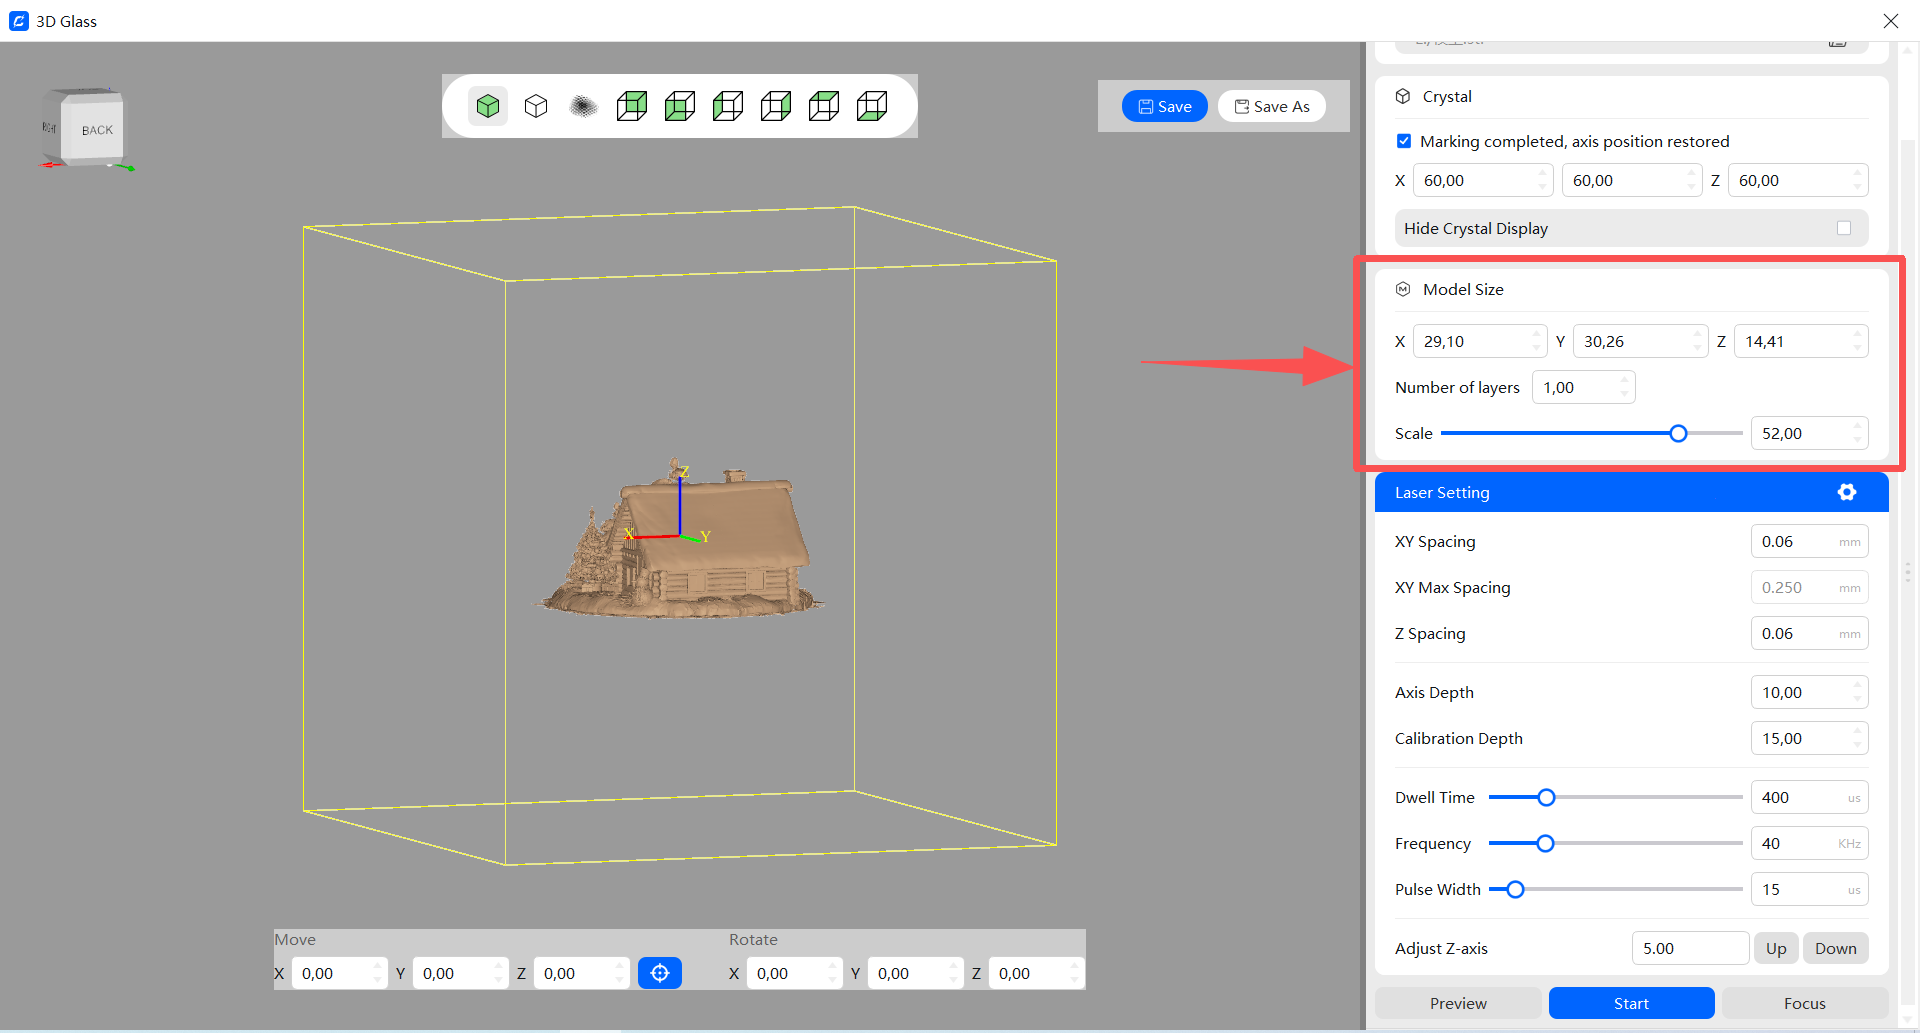
8. Adjust Model Size and Orientation
-
For accurate engraving, adjust the model size according to the sphere diameter:
-
Maximum engraving size should be set to 55% of the sphere’s diameter (for a 60mm sphere, set the model to 34mm maximum).
-
-
If the model’s orientation is incorrect, use the Move and Rotate tools in ComMarker Studio to adjust its position on the X, Y, and Z axes.
9. Final Adjustments and Settings
-
For 6W laser models, use the following settings:
-
XY Spacing: 0.06mm
-
Z Spacing: 0.06mm
-
Dwell Time: 400μs
-
Frequency: 40 kHz
-
Pulse Width: 10 ns
-
-
For 12W laser models, adjust to:
-
XY Spacing: 0.06mm
-
Z Spacing: 0.06mm
-
Dwell Time: 300μs
-
Frequency: 40 kHz
-
Pulse Width: 16 ns
-
10. Begin Engraving
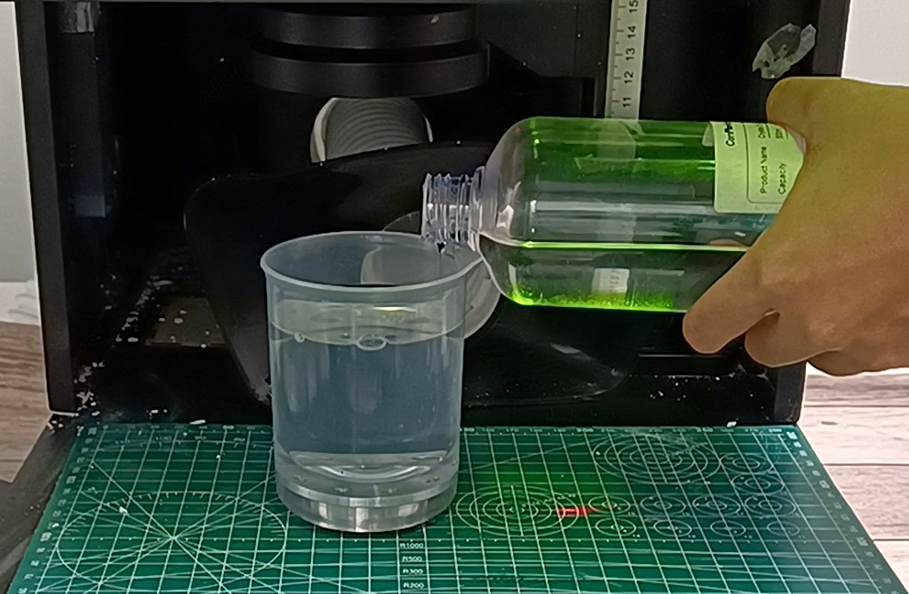
-
Pour the engraving oil into the measuring cup until the liquid level just covers the surface of the crystal ball.
-
Close the safety door and click “Start” to begin the engraving process.
11. Clean Up After Engraving
Once the engraving is complete, carefully remove the engraved crystal ball from the cup. Clean the ball and the engraving bed to ensure no debris is left behind.
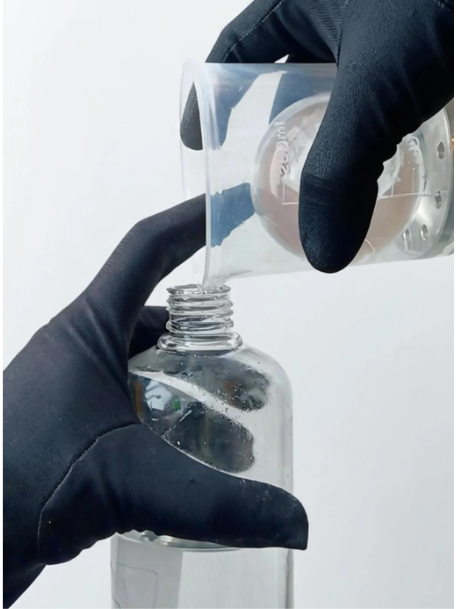
12. Reuse the Engraving Oil
-
After engraving, carefully pour the engraving oil back into the bottle using the measuring cup, ensuring no debris enters the oil for reuse.
-
Store the engraving oil properly for future use.
Tips for Successful 3D Glass Engraving:
-
Always verify the alignment from multiple angles to prevent misalignment.
-
Adjust the Z-axis as needed to ensure the laser head is focused precisely on the surface of the crystal ball.
-
Ensure the 3D file (STL, OBJ, GLB) is error-free and properly sized for the crystal ball.
Final Thoughts:
Engraving 3D designs on crystal balls with the ComMarker Omni X/XE UV Laser Engraver is a powerful way to create stunning, one-of-a-kind glass pieces. Whether you’re making personalized gifts or expanding your business, the precision and clarity provided by the Omni X/XE ensure your creations will impress. Follow these steps and tips to achieve flawless results every time.