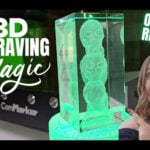
Welcome back to the Rise and Grind Workshop! In today’s blog, I’m excited to share my hands-on unboxing and first experience with the ComMarker Omni X Machine. This isn’t just another UV Laser Engraver—it’s an upgraded version of the popular Omni 1, now offering advanced features like 3D internal glass engraving, smart image optimization, and remote control functionality.
If you’ve been looking for a UV laser that’s fully enclosed, easy to set up, and powerful enough for both hobby and professional use, the Omni X deserves your attention. Let’s walk through the unboxing, setup, software connection, and first engraving tests together.
Unboxing the ComMarker Omni X Machine
One thing I’ve learned after unboxing multiple engravers is that ComMarker has a real eye for detail. The Omni X Machine arrived carefully packaged, with every component in its own labeled box. Right from the start, I knew this was designed with user experience in mind.
Inside, you’ll find:
-
The Omni X UV laser source
-
A solid base and column with riser plate
-
Fully enclosed protective cover with handles
-
Accessory box (screws, LED light, cabling, exhaust options, etc.)
-
Clear instruction manual
For beginners, the assembly might look intimidating, but the process is straightforward. Most parts fit together with pre-applied Loctite screws and only require basic tools.

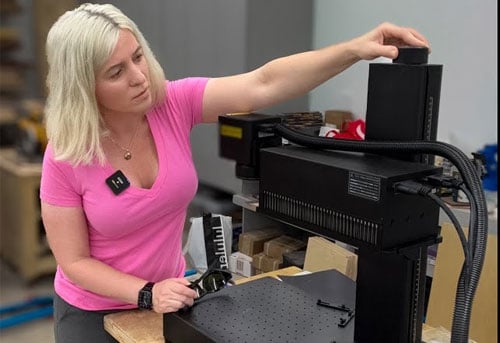
Assembly and Setup
Step by step, the Omni X comes together easily:
-
Attach the column to the base using the accessory kit screws.
-
Install the laser source on the bracket. Alignment is precise, so there’s no guesswork.
-
Connect the cables—each plug is uniquely shaped, making it impossible to misconnect.
-
Add the protective case and cover. This part can be a little tricky, and having an extra pair of hands really helps.
-
Finish by plugging in the exhaust system or optional fume extractor.
Once fully assembled, the Omni X Machine stands at 27 inches tall, 20 inches deep, and 12 inches wide—a compact but sturdy footprint that’s perfect for workshops, studios, or even trade show booths.

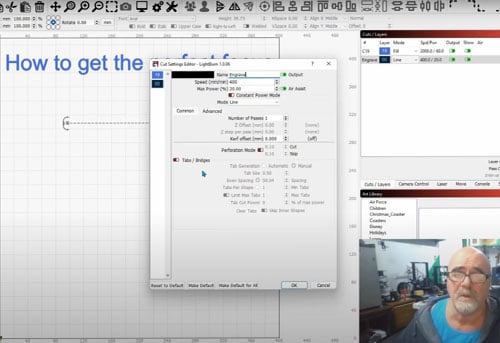
Software: ComMarker Studio vs. LightBurn
A standout feature of the Omni X UV Laser Engraver is its dual software compatibility.
-
ComMarker Studio: Needed for 3D internal glass engraving. The setup is simple—just install the provided drivers from the included USB stick.
-
LightBurn: Works perfectly for surface engraving on common materials. Connecting the Omni X to LightBurn is quick thanks to the auto-detect function. Just tweak a few settings (like frequency, pulse range, and UV laser type) and you’re good to go.
This flexibility means you’re not locked into a single workflow—you can choose what works best for your projects.

First Engraving Tests
Of course, the fun part is testing what this UV Laser Engraver can do. I ran a few materials through the Omni X Machine, and here are the results:
-
Black Acrylic: Clean, sharp engraving without melting. UV precision shines here.
-
Leatherette: High detail with no soot or mess—a big win compared to CO₂ engraving.
-
Anodized Aluminum Card: Smooth, professional finish with strong contrast.
These results confirm what UV lasers are known for: cold engraving with minimal thermal damage, perfect for delicate materials.

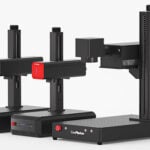
Omni X vs. Omni 1
I placed the Omni X Machine side by side with my older Omni 1 for comparison. While both are excellent UV Laser Engravers, the Omni X clearly steps things up with:
-
3D internal engraving support (exclusive to ComMarker Studio)
-
A fully enclosed design for safety and dust control
-
Improved software integration
If you only need surface engraving, the Omni 1 still holds its ground. But for advanced projects, the Omni X is the clear choice.
Final Thoughts & Buying Advice
After unboxing, assembling, and testing, I can confidently say the ComMarker Omni X Machine is one of the most versatile UV Laser Engravers I’ve used. It combines safety, precision, and advanced features like 3D engraving, making it suitable for:
-
Hobbyists working with acrylic, leather, or small crafts
-
Small businesses engraving promotional products or jewelry
-
Makers who want to explore 3D glass art
-
Professionals needing a reliable, portable laser for trade shows
👉 If you’re considering upgrading from the Omni 1 or entering the UV engraving world for the first time, the Omni X Machine is an excellent investment.
And don’t forget—ComMarker often offers discount codes (like riseandgrind for 5% off). Always check before purchasing.
Key Takeaways
-
ComMarker Omni X Machine is a 5W UV Laser Engraver with 3D engraving capability.
-
Easy to assemble with clear instructions and labeled components.
-
Compatible with ComMarker Studio (3D) and LightBurn (surface engraving).
-
Delivers clean, detailed results on acrylic, leatherette, and aluminum.
-
Best choice if you need an enclosed, safe, and versatile UV laser for both hobby and professional use.