If you’ve just unboxed your new ComMarker UV Laser Engraver, congratulations — you’re about to step into one of the most precise engraving systems available today.
Whether you’re using the Omni X, Omni XE, or another ComMarker model, the setup process is simple once you understand the basics.
This guide walks you through installing ComMarker Studio, connecting your engraver, and creating your very first engraving step by step.
Step 1: Installing ComMarker Studio
Before engraving, you’ll need to install the official ComMarker Studio software — available for both Windows and Mac.
🔹 For Windows:
-
Plug in your power cable and data cable.
-
Insert the USB drive that came with your machine.
-
Copy all files from the USB to your computer.
-
Open the ComMarker software folder and run the installer.
-
Follow the prompts — click Next or Install until finished.
-
A desktop shortcut will appear once installation is complete.
💡 Tip:If installation fails, visit ComMarker.com → Download Center → Software for Windows to get the latest version.
Unzip the file and reinstall.
🔹 For Mac:
-
Copy the USB files to your computer.
-
Open the ComMarker Studio folder and double-click the installer.
-
Drag the ComMarker Studio icon into your Applications folder.
-
If a warning appears, go to System Preferences → Security & Privacy → Open Anyway, then click Open.
-
Agree to the disclaimer and complete installation.
💡 Tip:For updates, visit ComMarker.com → Download Center → Software for Mac.
Step 2: Connecting the UV Laser Engraver
Once ComMarker Studio is installed:
-
Launch the software.
-
Connect your UV Laser Engraver via USB.
-
Load the device parameters when prompted.
-
Restart the software to sync settings.
-
Click Create to open a new workspace.
You’re now ready to explore ComMarker Studio’s main tools.
Step 3: Getting to Know ComMarker Studio
ComMarker Studio offers an intuitive layout designed for both beginners and professionals.
Here’s what you’ll find in the main menu:
-
File Import: Load images, logos, and designs.
-
Language Selection: Switch between multiple interface languages.
-
View Options: Adjust workspace view and zoom.
-
Device Settings: Access advanced parameters for your UV Laser Engraver.
⚙️ Device Settings Explained
Under Device Settings, you’ll find key configuration options:
-
Field: Defines the engraving area and focus based on your lens (e.g., 70mm or 150mm).
-
Other: Includes basic operational settings — these rarely need adjustment unless advised by technical support.
-
Password Protection: Prevents accidental parameter changes.
Step 4: Designing Your First Project
Inside ComMarker Studio, you can easily create or import designs. Try these options:
-
Add text or numbers
-
Draw simple patterns or shapes
-
Import vector files (e.g., SVG, DXF)
-
Upload and adjust images
-
Generate QR codes or barcodes
-
Browse the Gallery for ready-made ideas
-
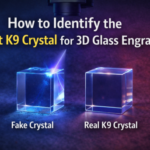
Experiment with 3D internal engraving for glass or crystal
Once you’ve chosen a design, it’s time to fine-tune your engraving parameters.
Step 5: Understanding Engraving Parameters
Laser engraving depends on precise control of speed, frequency, and pulse width.
Here’s what each setting does:
| Parameter | Function |
|---|---|
| Mode | Defines the engraving pattern (fill, line, etc.) |
| Speed | Controls how fast the laser moves — higher speed = faster job but lighter mark |
| Frequency | Adjusts pulse density for smoother fills |
| Pulse Width | Shorter for fine detail; longer for deeper engraving |
| Interval | Spacing between lines — smaller values create denser, smoother fills |
| Passes | Number of times the laser repeats over the same area |
| Continuous Mode | Keeps the laser on for uninterrupted marking |
| Material Library | Provides preset settings for various materials |
| Preview | Outlines the engraving area without firing the laser |
| Focus | Adjusts laser height for optimal sharpness |
| Start | Launches the engraving process |
Step 6: Your First Engraving – Text on Metal
Let’s walk through your first engraving using a metal card from the material pack.
-
Place the metal card on the workbench under the red alignment dot.
-
Click Focus in the software.
-
If it’s out of focus, use the Up/Down buttons to adjust, then focus again.
-
-
Click Text, then click on the canvas to place your text.
-
Apply Fill to turn it into a solid vector.
-
Confirm your lens selection matches the one installed on your machine.
-
Click Preview to check the placement.
-
Resize or reposition if needed, then preview again.
-
Enter the suggested engraving parameters from the Material Library.
-
Close the safety door, and click Start.
When the job finishes, open the door and admire your first engraving — clean, crisp, and professional.
Step 7: Troubleshooting and Support
If you encounter issues — like focus errors or parameter mismatches — don’t worry.
ComMarker offers complete after-sales support via the Support Center and FAQs.
You can also check your Order Status, download the latest drivers, or contact technical support directly at [email protected].
Final Thoughts
Setting up your ComMarker UV Laser Engraver might sound intimidating at first, but once you’ve gone through these steps, you’ll see how intuitive it really is.
The combination of ComMarker Studio, LiDAR autofocus, and ready-made material presets makes it easy to start engraving like a pro — even on day one.
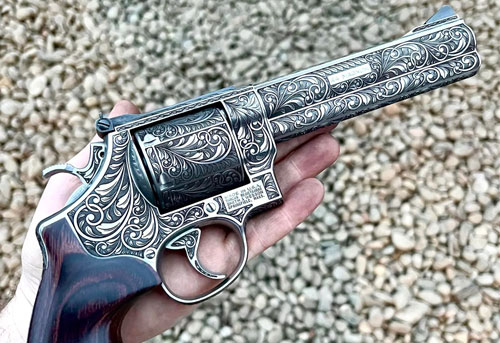
Whether you’re personalizing metal cards, engraving glass trophies, or creating detailed logos on acrylic, your ComMarker UV Laser Engraver gives you industrial precision with beginner-friendly control.