Material cutting is one of the most exciting capabilities of a laser engraver — from crafting acrylic signs to creating wooden inserts or custom metal tags. But to get clean, accurate cuts (without burning or misalignment), setup and proper parameters are essential.
In this guide, I’ll walk you through how to cut materials using your ComMarker Laser Engraver, especially for beginners using ComMarker Studio software for the first time.
✅ Step 1: Set Up Your Laser Engraver Correctly
Before starting any cutting task, make sure the machine and workspace are ready.
✔ Pre-Cutting Checklist:
-
Install and open ComMarker Studio.
-
Connect your laser engraver to your computer.
-
Remove the lens cap.
-
Turn on the laser machine.
Protect Your Machine:
-
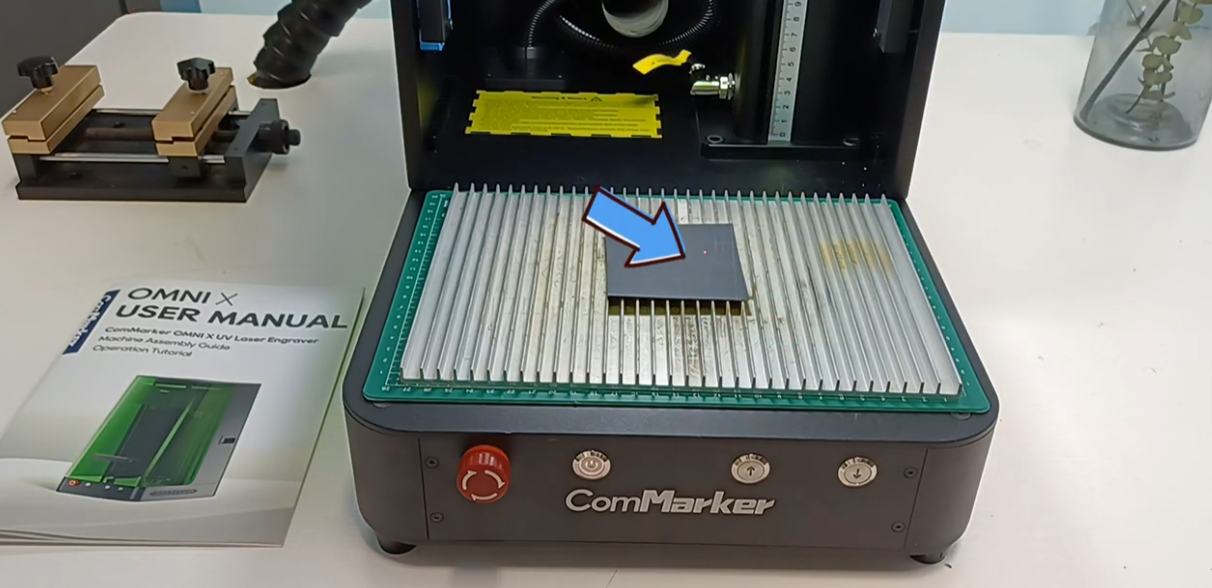
Place a flat backing board (like MDF or acrylic) under your material — this prevents damage to the work platform.
-
Secure your material firmly.
-
If it’s light or thin material, use the metal sheet holder to keep it flat.
🎯 Step 2: Focus the Laser for Accurate Cutting
Accurate focus ensures clean cuts — no burns, no uneven edges.
-
Make sure the red alignment dot lands exactly on the surface of your material.
-
For glass or transparent materials, place a piece of paper on top. This helps the sensor detect the surface properly.
-
Click the Focus button in the bottom-right corner of ComMarker Studio.
-
If focus is off, use the Up/Down buttons, then tap Focus again.
🎨 Step 3: Import or Create Your Cutting Design
You can start designing directly in ComMarker Studio using:
-
Draw shapes (circle, square, etc.)
-
Text tool
-
Import vector files (.svg, .dxf)
-
Logo or custom design
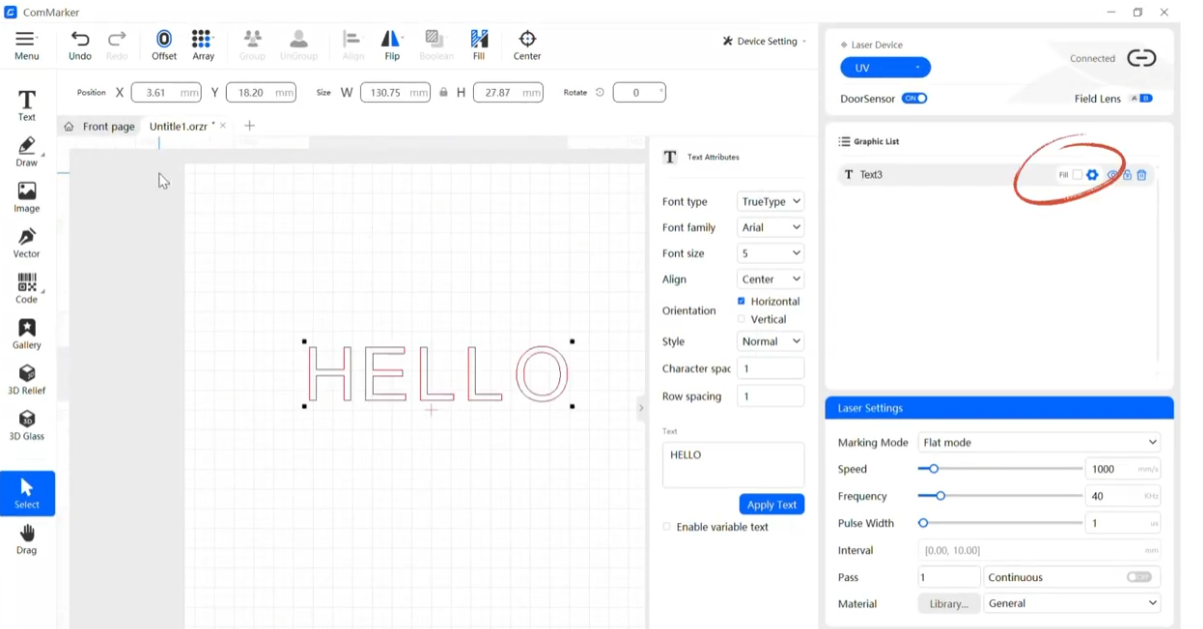
⚠ Important: Disable Fill
Cutting only needs an outline — not filled shapes. Make sure the “Fill” option is turned OFF.
✂ Step 4: Prepare Your Design for Cutting
✅ Create Cutouts or Gaps
If your design includes shapes inside shapes (like a ring or frame):
-
Draw a small “gap” shape.
-
Select both the main and gap layers.
-
Click Boolean → Subtract Top.
This prevents pieces from falling out while cutting.
✅ Create an Outline (Cut Line)
-
Select your design.
-
Click Offset.
-
Choose how thick or thin you want the outline.
-
Confirm.
✅ Group or Move Elements
-
Drag to select multiple shapes.
-
Click Group to move them together smoothly.
-
Click Ungroup at any time.
🛠 Step 5: Preview Before You Cut
-
Ensure the correct lens is selected (like 70 mm or 150 mm).
-
Adjust design size to fit your material.
-
Click Preview — the laser will show where it will cut without firing.
-
Use the Preview Helper to position your design exactly.
-
Click Stop Preview once aligned.
⚙ Step 6: Enter Laser Cutting Settings
In the settings panel, adjust:
| Setting | What It Does |
|---|---|
| Power | Higher power = deeper cuts |
| Speed | Slower speed = stronger cuts |
| Frequency | Pulse density — affects smoothness of cuts |
| Passes | Number of times the laser repeats the cut |
💡 Not sure how many passes you need?
Select Continuous Mode and stop when the material is fully cut.
🚦 Step 7: Start Cutting
Once everything looks good:
-
Close the safety door.
-
Click Start to begin the cutting process.
When the job finishes:
-
Open the safety door.
-
Carefully remove the material and test if the parts separate cleanly.
🧩 Troubleshooting & Support
| Problem | Quick Solution |
|---|---|
| Edges look burnt | Increase speed or reduce power |
| Not fully cut | Add more passes or lower speed |
| Misaligned cut | Re-check focus and preview alignment |
| Software not responding | Reconnect the machine and restart ComMarker Studio |
If you still have issues:
📧 Email: [email protected]
🌐 Visit: ComMarker Support Center
✅ Final Thoughts
Cutting with a laser engraver opens up endless creative possibilities — signs, custom crafts, packaging inserts, leather tags, and more. With the right setup, focus, and cutting parameters, you’ll get clean, professional results even on your first try.
Once you master it, laser cutting becomes not just a technique — but a powerful tool for business, gifting, and creativity.

