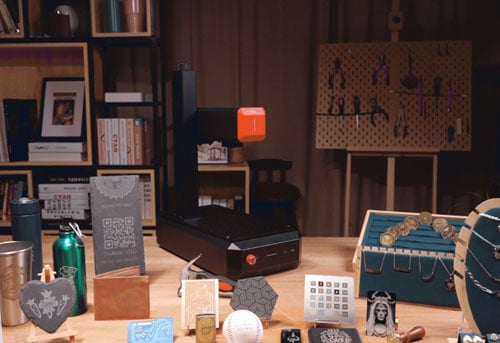
Fiber laser engraving machines are widely known for high speed, clean metal cutting. With the right setup and settings, even a 20W fiber laser engraver can cut metal with high quality.
In this step-by-step guide, we will share how to cut metal with fiber laser engraver using LightBurn.
What You Need Before Starting
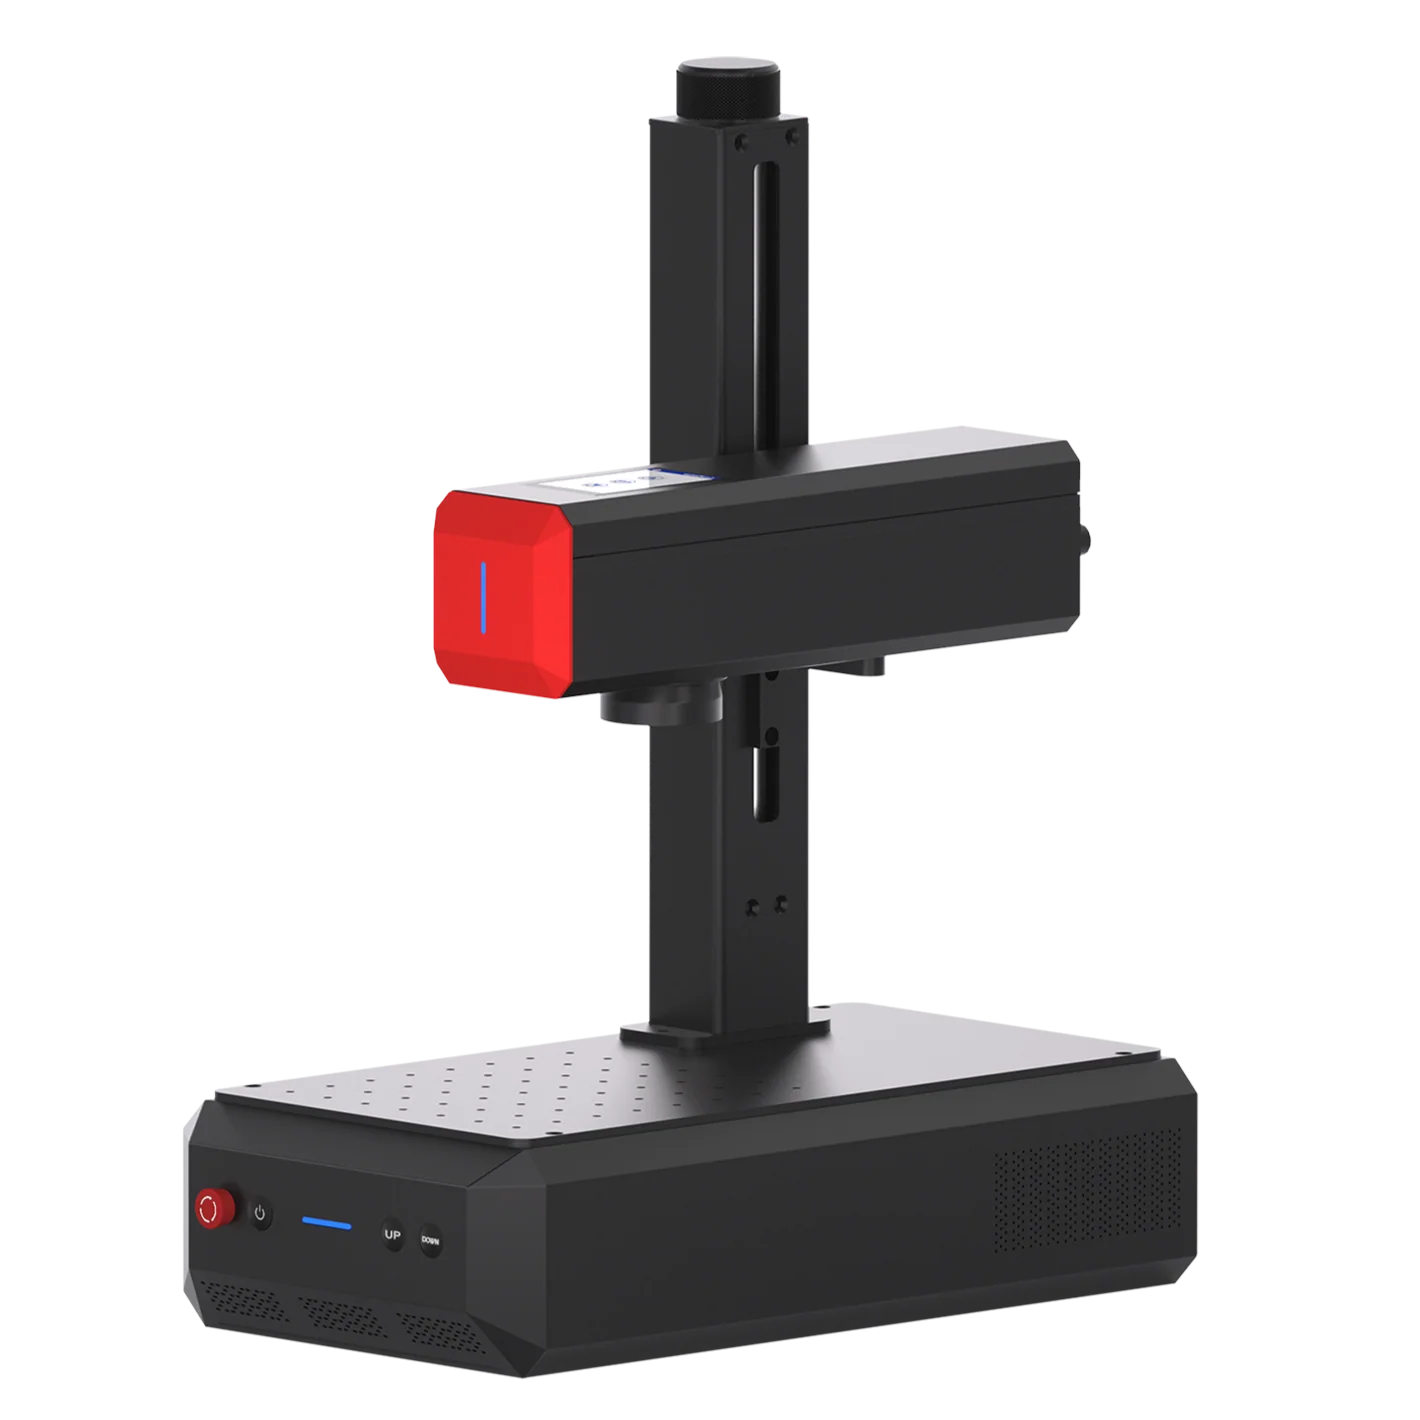
- Fiber Laser Engraver (200w ComMarker Titan MOPA fiber laser engraver)
- 110 mm lens (ideal for detail and power balance)
- Metal Sheet (2mm thick stainless steel in this tutorial)
- Metal Sheet Holder
- LightBurn Laser Software

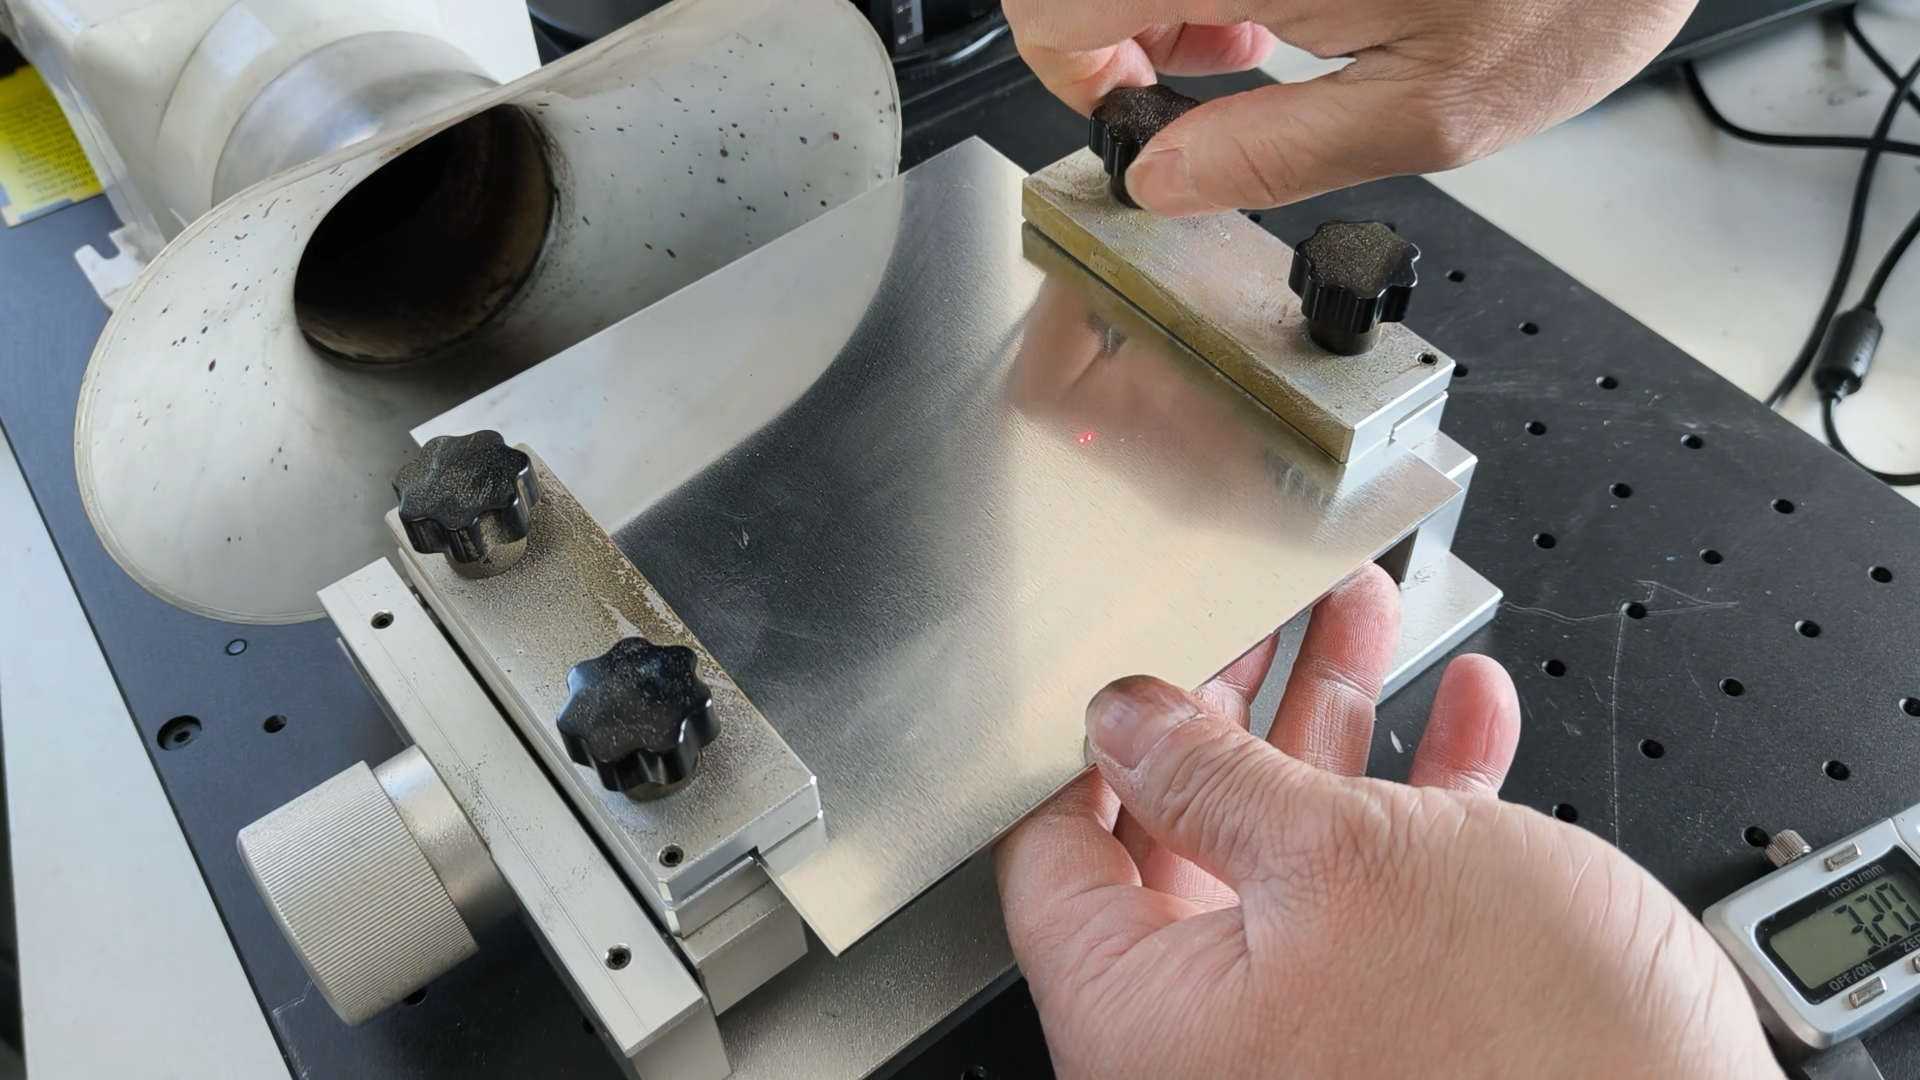
Step 1: Secure the Material and Preform Focusing
If your metal is thicker than 1 mm, always clamp it in a metal holder.
Heat from fiber laser engraving metal can cause metal sheets to warp and a stable surface produces cleaner cuts.
A high power MOPA fiber laser engraver is recommended. A ComMarker Titan MOPA fiber laser engraver can operate with 200W ultra higher power, make metal cutting and engraving fast and efficient.
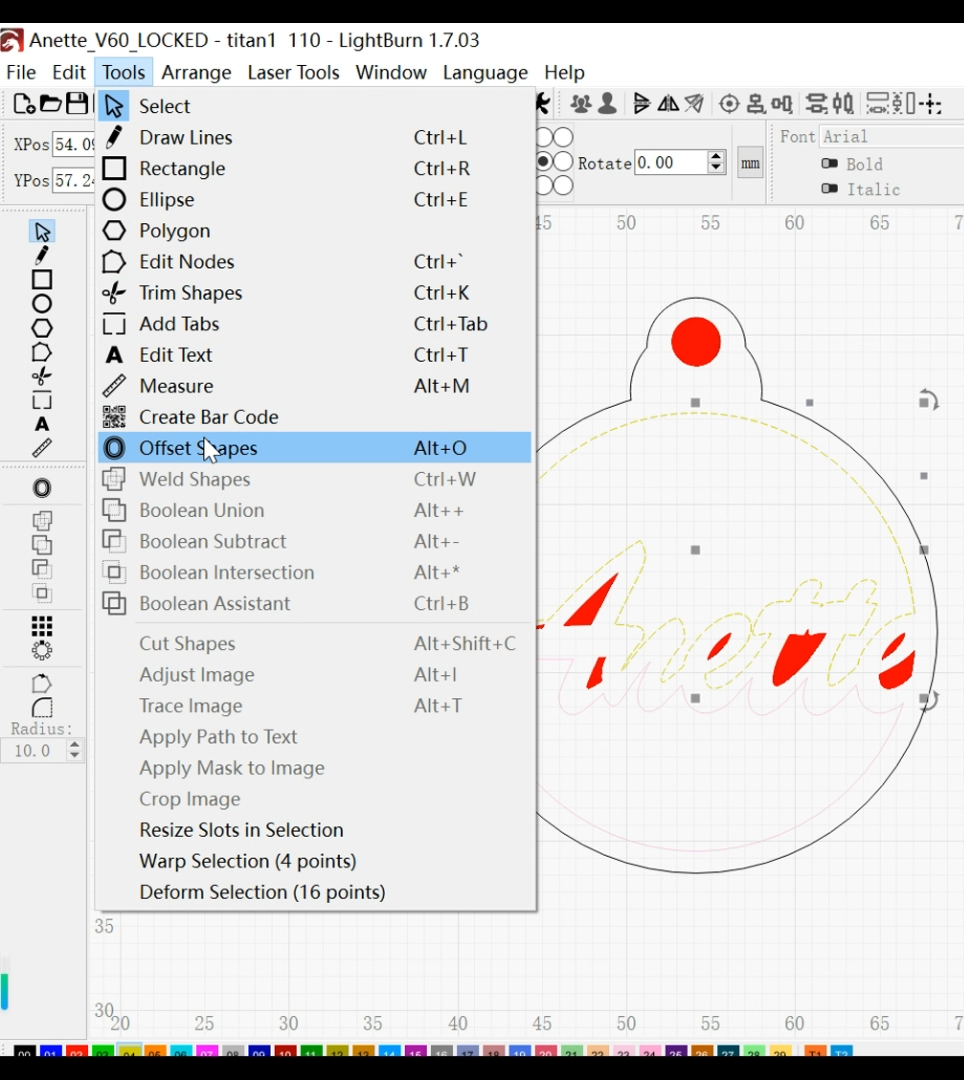
Step 2: Import and Prepare Your Design
Open your file in LightBurn and select the design to ungroup it.
When cutting metal, start with the smallest elements before moving to larger outlines.
If the outer shape is cut first, internal pieces can shift slightly and affect alignment.

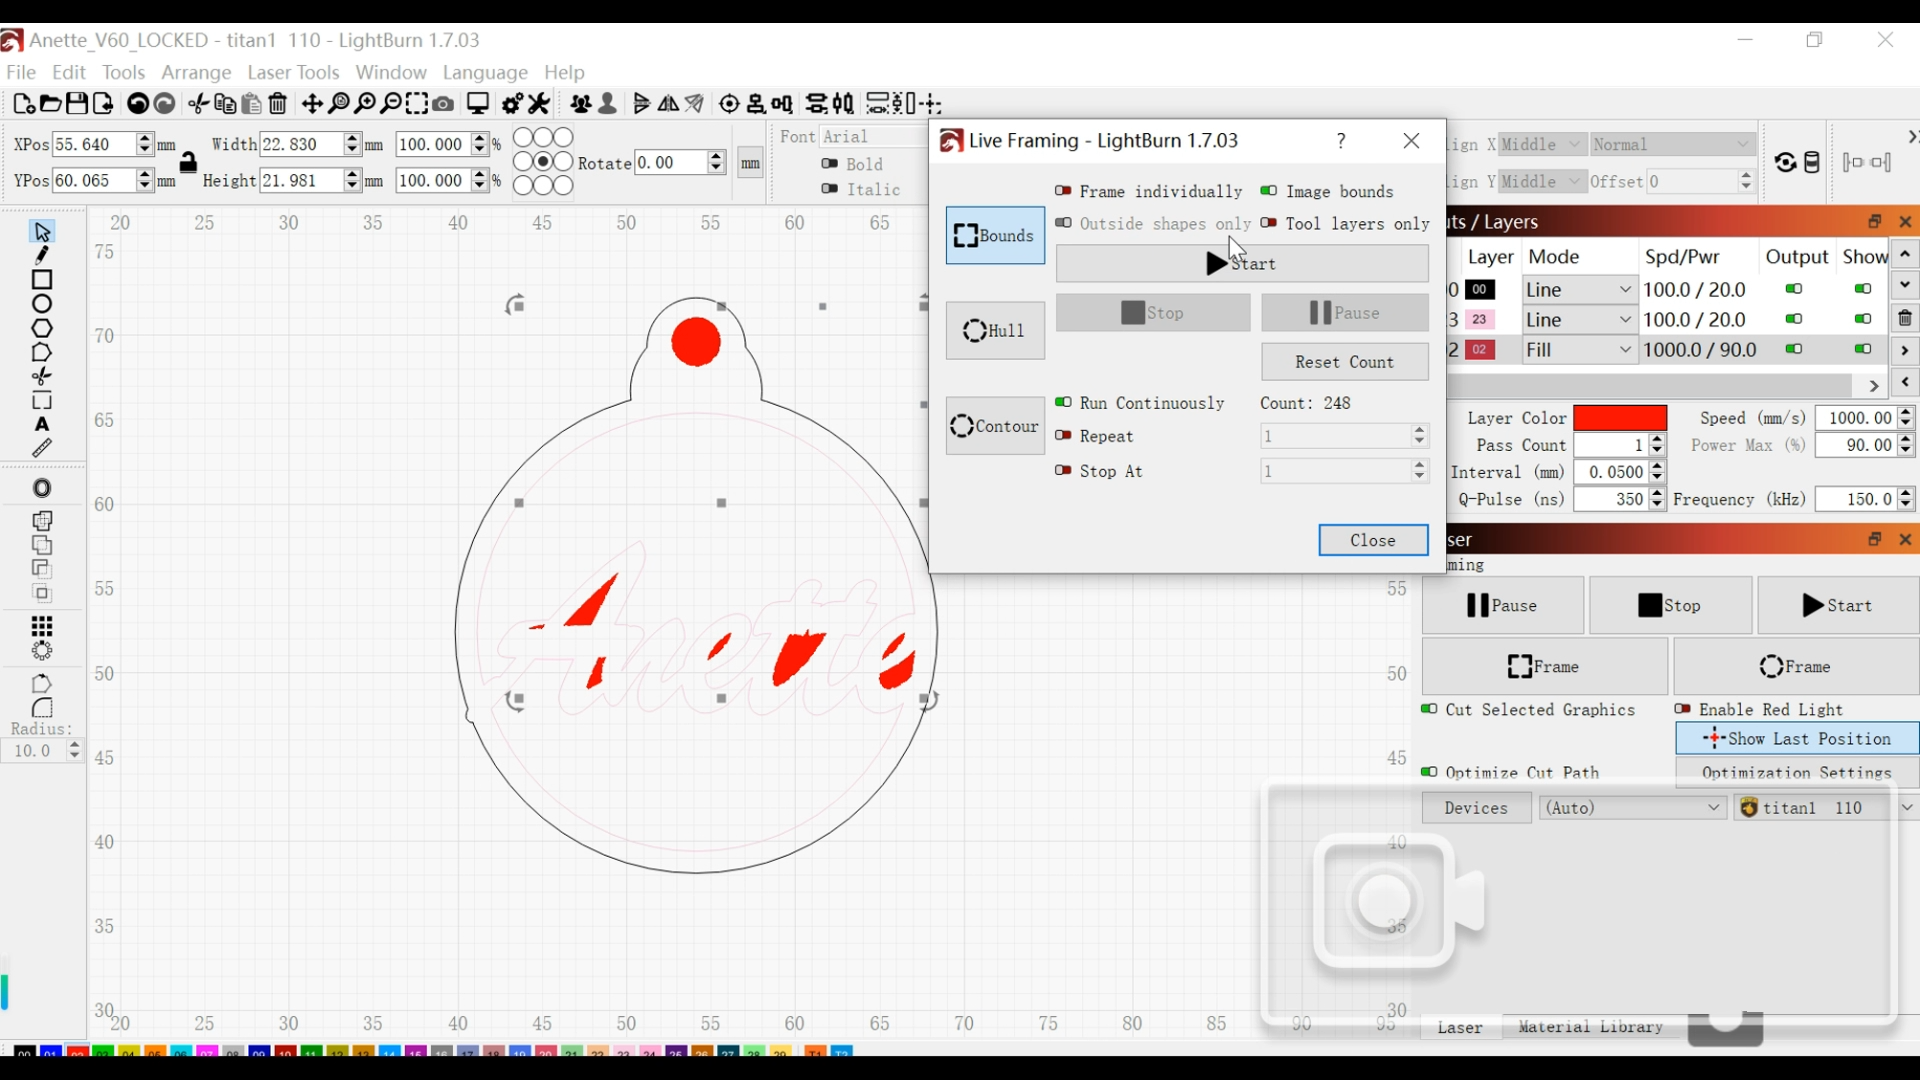
Step 3: Import the Setting
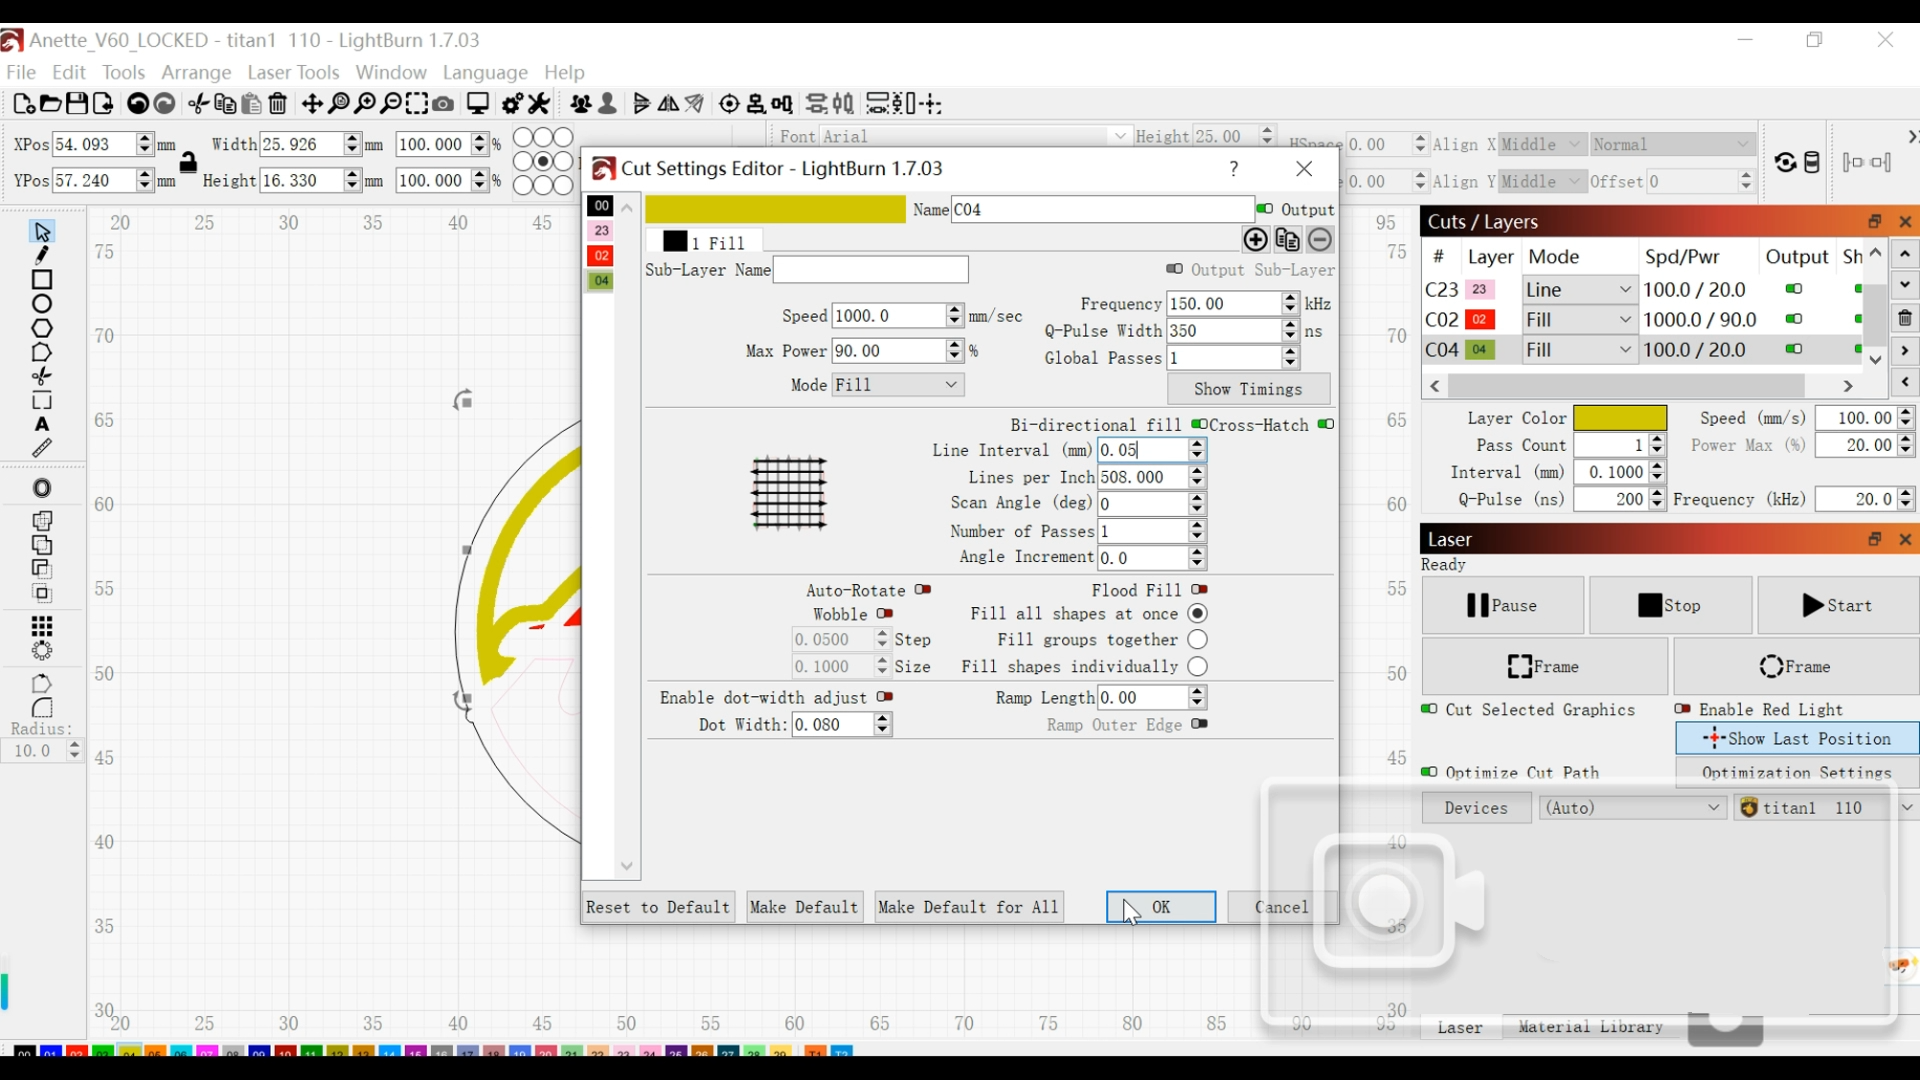
1)For Small Shapes, Use Fill Mode
Click the layer you want to engrave and import your setting into the pop-up window.
200w ComMarker Titan MOPA fiber laser engraver stainless steel cutting setting:
Speed 1000 mm/s; Power 90%; Frequency 150 kHz; Q-Pulse 350 ns; Line interval 0.05 mm; Mode: Fill; Bidirectional fill: ON; Crosshatch: ON.
These settings distribute heat evenly and help the laser handle the metal more efficiently. Different metal prefer different settings.

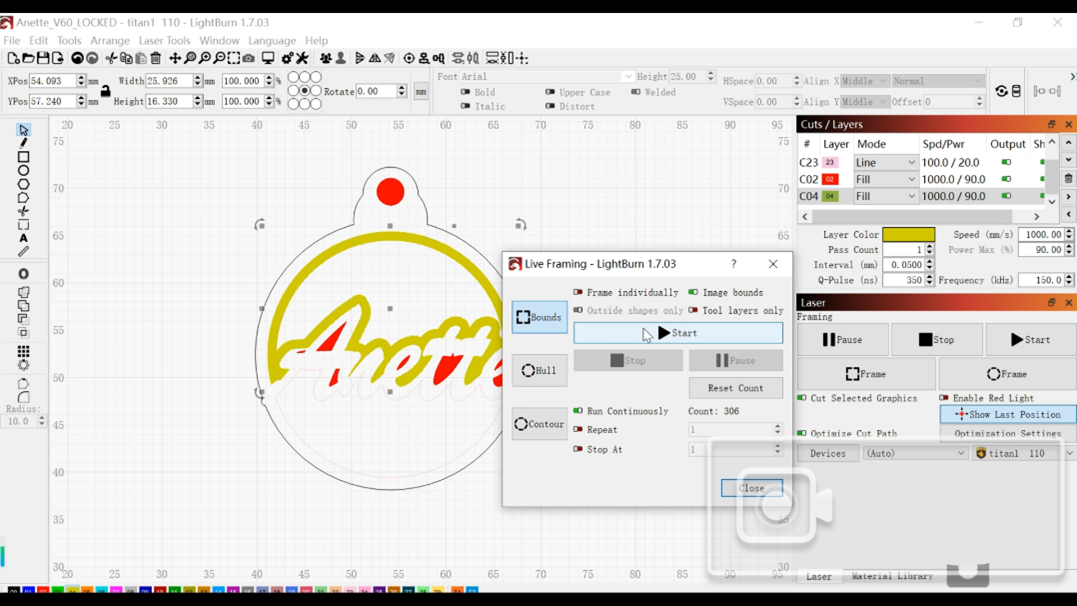
2)Unsure How Many Passes? Turn on Continuous Run
If you are unsure how many passes are required, click Frame and enable Run Continuously so the laser repeats automatically until the cut is complete.
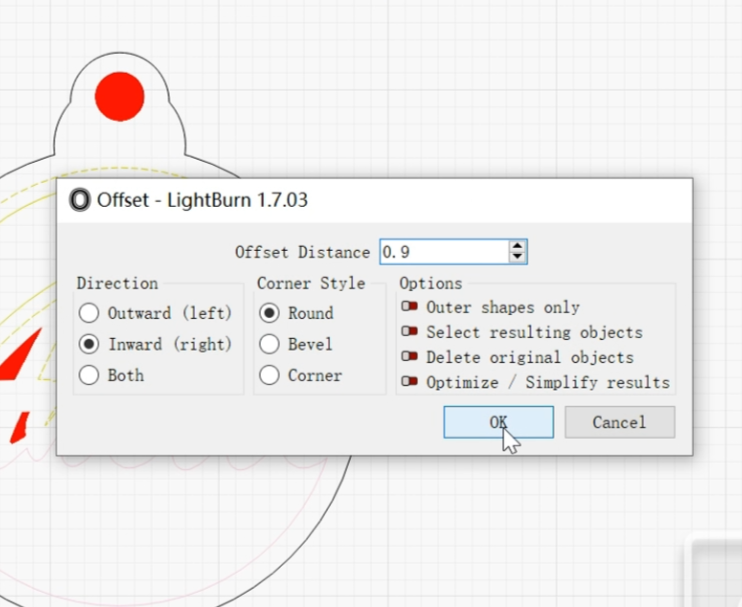
3)For Thicker Metal Cutting: Switch to Offset Mode
When cutting metal thicker than 0.5 mm, switch to Offset Mode by clicking Tools→Offset Shapes→Offset Distance
Offset thickens the cutting path, prevents metal from rewelding together and creates smoother edges.
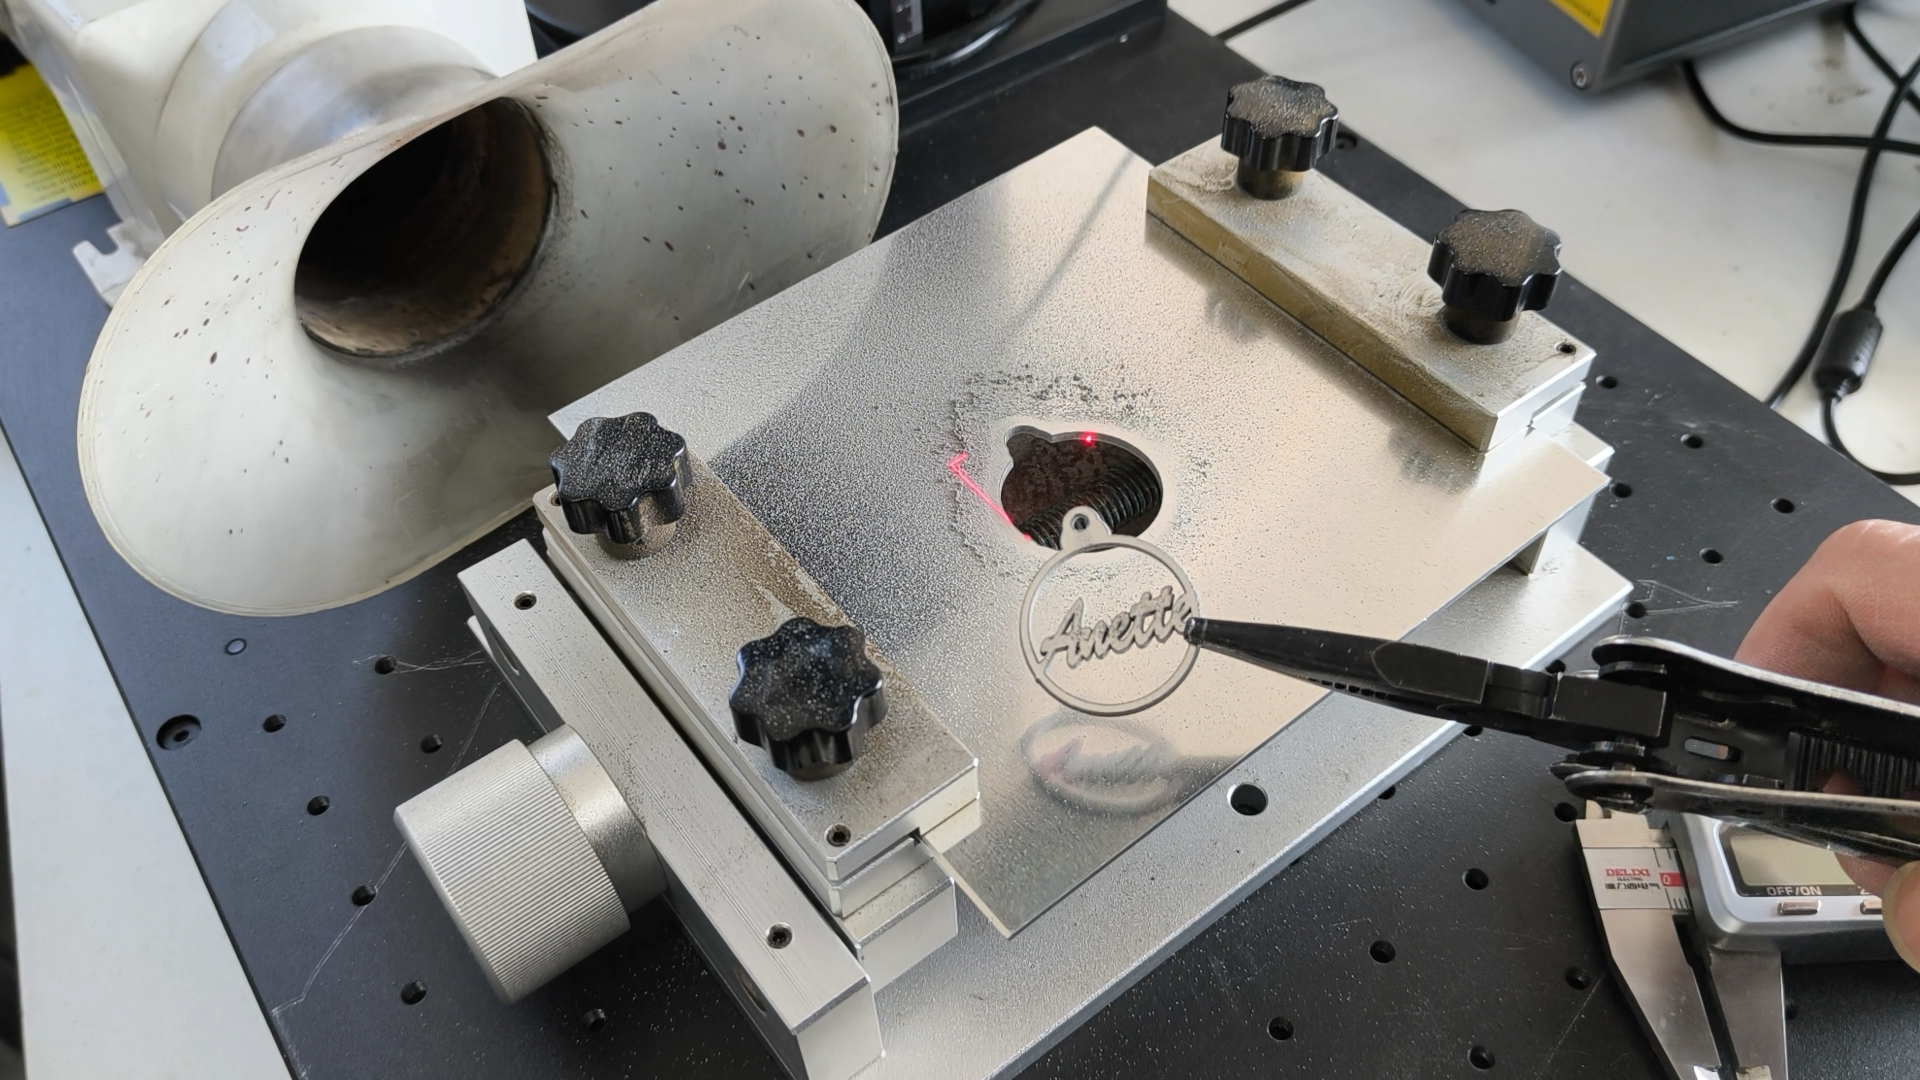
Step 4: Cut the Inner Shape
Click Frame→Bounds to preview, then press Start to begin the engraving process.
Step 5: Cut the Outer Shape
Your final cut should always be the outer boundary.
Use:
-Offset Mode
-Run Continuously
Let the laser repeat until the piece fully separates. Stopping too early can leave small connection points that require manual force and may damage the edge.
*Mind the heat while picking the work piece.
Pro Tips to Improve Fiber Laser Cutting Results
-Focus Is Critical
Even a slight focus error reduces power density significantly. Refocus whenever you change material thickness.
-Optimize Your Cutting Order
Follow this sequence: small → inner → outer. This approach improves stability and accuracy.
-Polish the Work Piece
Polish after laser cutting using sanders or grinders to smooth the edges and remove sharp burrs and micro-defects.
-Turn on Fume Extractor
Removes smoke and harmful fumes produced during laser cutting, improving air quality and protecting health.
Key take away
Engraving metal with a fiber laser engraver may seem challenging at first, but with the right workflow, the process becomes predictable and consistent.
Start by securing your material. Then cut the inner shapes before moving to outer outlines.
Use fill mode for fine details and switch to offset mode for thicker metals.
Run the laser continuously when unsure about passes.
By following these steps, you can achieve clean, professional metal cuts even on a compact desktop fiber laser engraver.