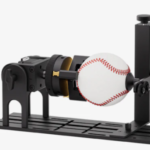
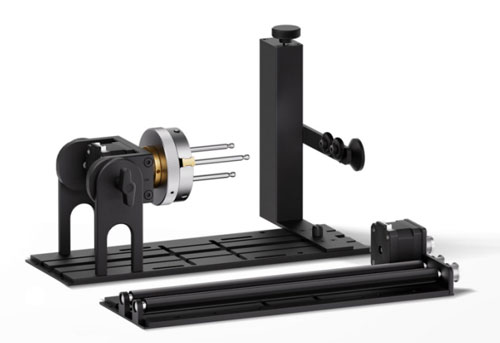
Engraving tumblers with a UV laser engraver is a fantastic way to personalize gifts, create promotional items, or add custom designs to everyday products. The ComMarker R5 Rotary Chuck is designed to handle cylindrical objects like tumblers, making the engraving process smoother and more accurate. Here’s a step-by-step guide on how to use the ComMarker Omni X/XE UV laser engraver with the ComMarker R5 rotary chuck to engrave tumblers.
Step-by-Step Guide for Tumblers Engraving:
1. Preparing Your Tumbler
-
-
The first step is to prepare a tumbler. Measure the engraving area’s diameter using a vernier caliper or ruler. This ensures that the engraving will fit properly onto the tumbler.
-
Attach the rotary chuck to the engraving bed of the ComMarker Omni X/XE and place the tumbler securely on the chuck.
-
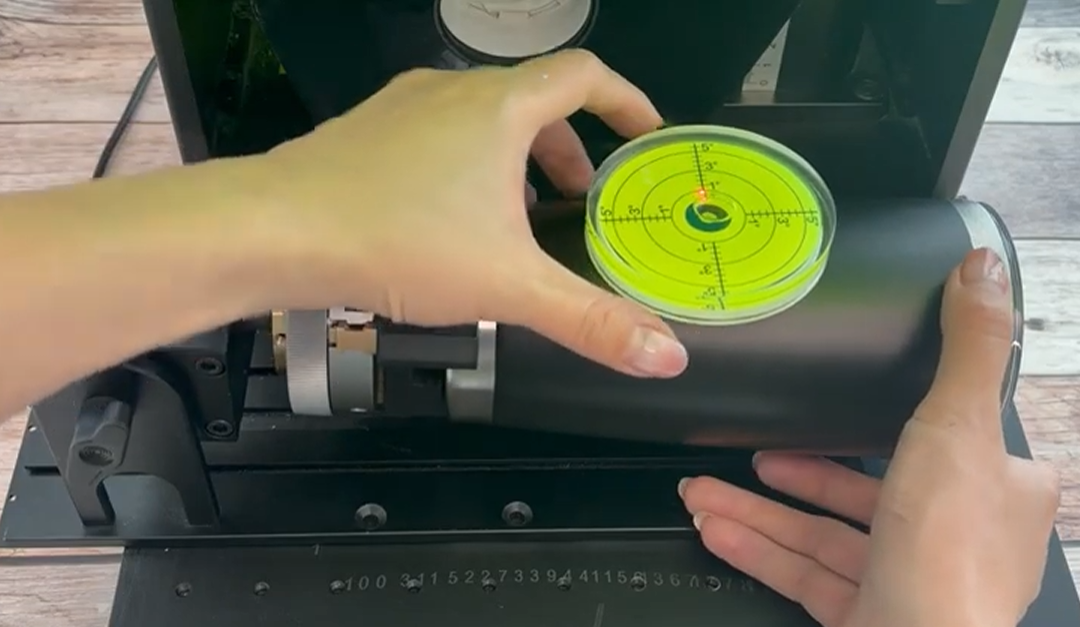
2. Leveling the Tumbler:
-
-
Using a spirit level, check to ensure the engraving area is perfectly horizontal. This is crucial because any tilt in the tumbler may lead to an uneven engraving.
-
Adjust the height of the tumbler slightly until the bubble in the spirit level is centered, indicating that the engraving area is level.
-
3. Importing and Adjusting the Design:
-
-
Next, open the ComMarker Studio software and import the design you want to engrave. You can easily import logos, text, or custom artwork. Select an image with great contrast for best result. You can check our photo adjustment guide for tumbler engraving for details.
-
Once the design is loaded, adjust its size and position. Center the design to align it with the engraving area on the tumbler. You can also rotate the design to fit the tumbler’s curvature, typically adjusting it to 270° or any other desired angle.
-
4. Auto-Focus and Engraving Settings:
-
-
Click the Focus button to start the autofocus. The system will automatically adjust the focal point based on the height of the tumbler.
-
If the system prompts that the object is out of range, you can adjust the height by pressing the up or down buttons to fine-tune it.
-
Enter the necessary engraving settings based on the material you’re working with. For tumblers, refer to the ComMarker material settings PDF to adjust the appropriate settings for speed, power, and frequency.
-
5. Previewing and Final Adjustments:
-
- Before starting the engraving, it’s important to use the Preview feature. This allows you to see how your design will look on the tumbler.
- Use the preview plate to check the engraving position and ensure everything is in place. Double-check that the design is aligned correctly and the engraving area is leveled.
6. Starting the Engraving:
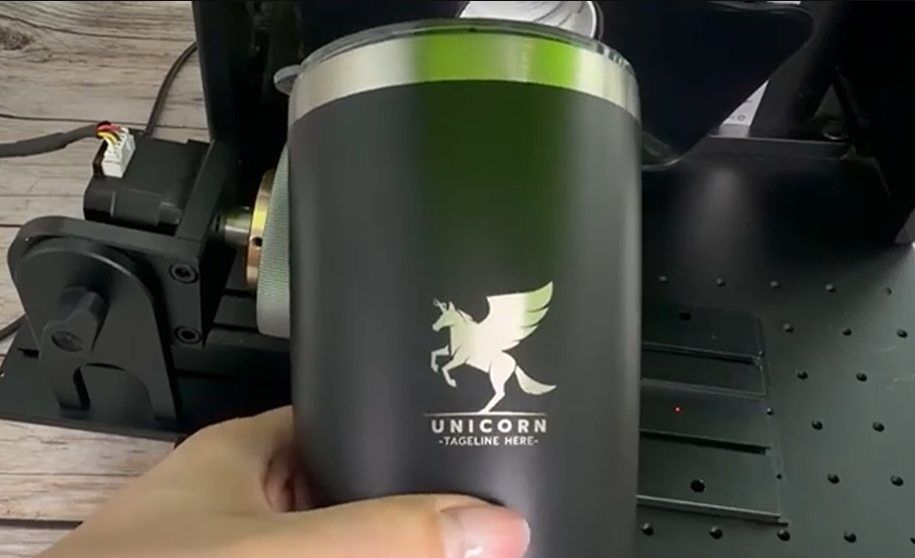
After everything is set, click Start to begin the engraving process. In most cases, a single pass will be sufficient for tumblers. However, if the painted coating is thick, multiple passes may be required for a clean and precise result.
Conclusions
With this straightforward process, you can quickly and easily engrave custom designs onto tumblers. Whether you’re making personalized gifts for the holiday season or creating branded merchandise, the ComMarker Omni X/XE with the ComMarker R5 Rotary Chuck makes the job much easier and faster.