Adding custom photo engravings to leather items like wallets and journals is one of the best ways to create high-value, unforgettable gifts. The best engravings usually come from a balance of good image prep and good material choice.
This guide provides a straightforward guide to choosing your leather, optimizing your photos, and setting up your laser for success.
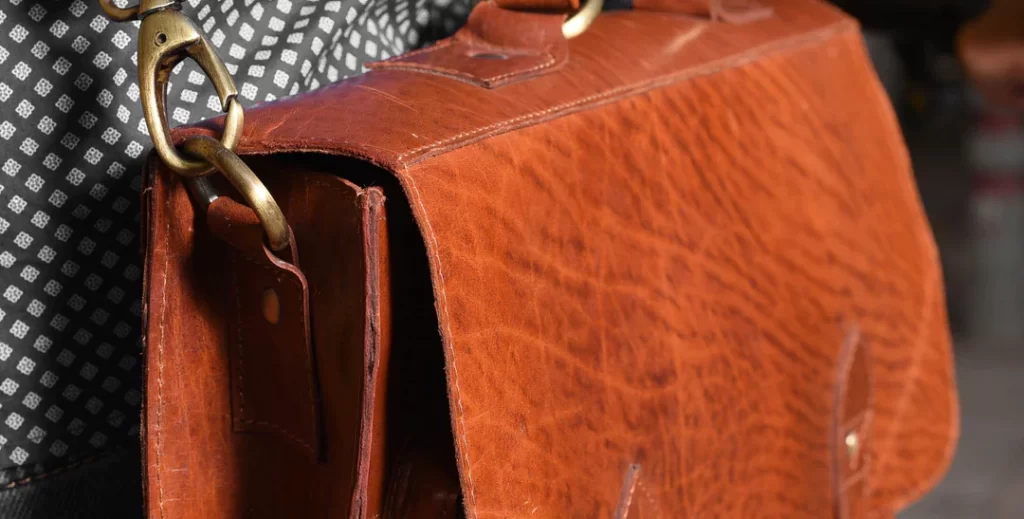
Choose the Right Leather
The leather you choose matters as much as the photo itself. Some leathers engrave cleanly, while others can produce weak contrast, blurry detail, or inconsistent burns.
Vegetable-tanned leather is usually the best choice. It is natural, firm, and reacts well to laser energy. It tends to produce the strongest contrast and the cleanest detail.
Chrome-Tanned Leather: Harder to engrave. It can release toxic fumes and lacks contrast.
Leather color matters: For photo engraving, lighter leather is usually easier to work with. Natural tan, light brown, beige, and other pale tones often give the best results because the burn stands out clearly. Darker leather can still work, but the contrast may be weaker and the image may need more careful tuning.
Leather types to avoid
Avoid leather that is synthetic or faux unless labeled laserable. Or leather that is heavily coated, glossy, oily, highly textured and suede-like.
Prepare the Photo Before Engraving
Adjusting the image helps to achieve a better carving effect and minimize the influence of the leather texture.
Step 1: Choose the right photo.
Select a clear, well-lit photo with a clearly defined subject, ideally one where the face or main subject occupies a larger proportion of the frame. A recommendation is at least 300 dpi, with 600 dpi or higher recommended for better results. Avoid photos with heavy shadows or cluttered backgrounds.
Step 2: Crop first, then remove the background.
Crop away unimportant background elements, keeping only the subject.
Step 3: Adjust the Image for Better Performance
The goal is to make the subject clearer and easier for leather to reproduce during engraving.
Start by slightly brightening the image. Increase brightness by around 5–15%. Leather engraving tends to lose shadow detail, so a slightly brighter image usually produces a cleaner result.
Then increase contrast by around 15–25% to separate the subject from the background and make facial features and outlines more visible.
Reduce highlights slightly, around 10%, to prevent bright areas from losing detail.
Bright up shadows by around 10–20% so dark areas do not turn into large burned patches during engraving.
Sharpen the image, increase it lightly by around 5–15%. Do not over-sharpen the image. Leather already has natural grain and texture, so too much detail enhancement can make the engraving look dirty or noisy.
Before exporting the image, check these points:
• the face should not look too dark
• dark areas should not merge together
• the main subject should stand out clearly
• small details should still look separated
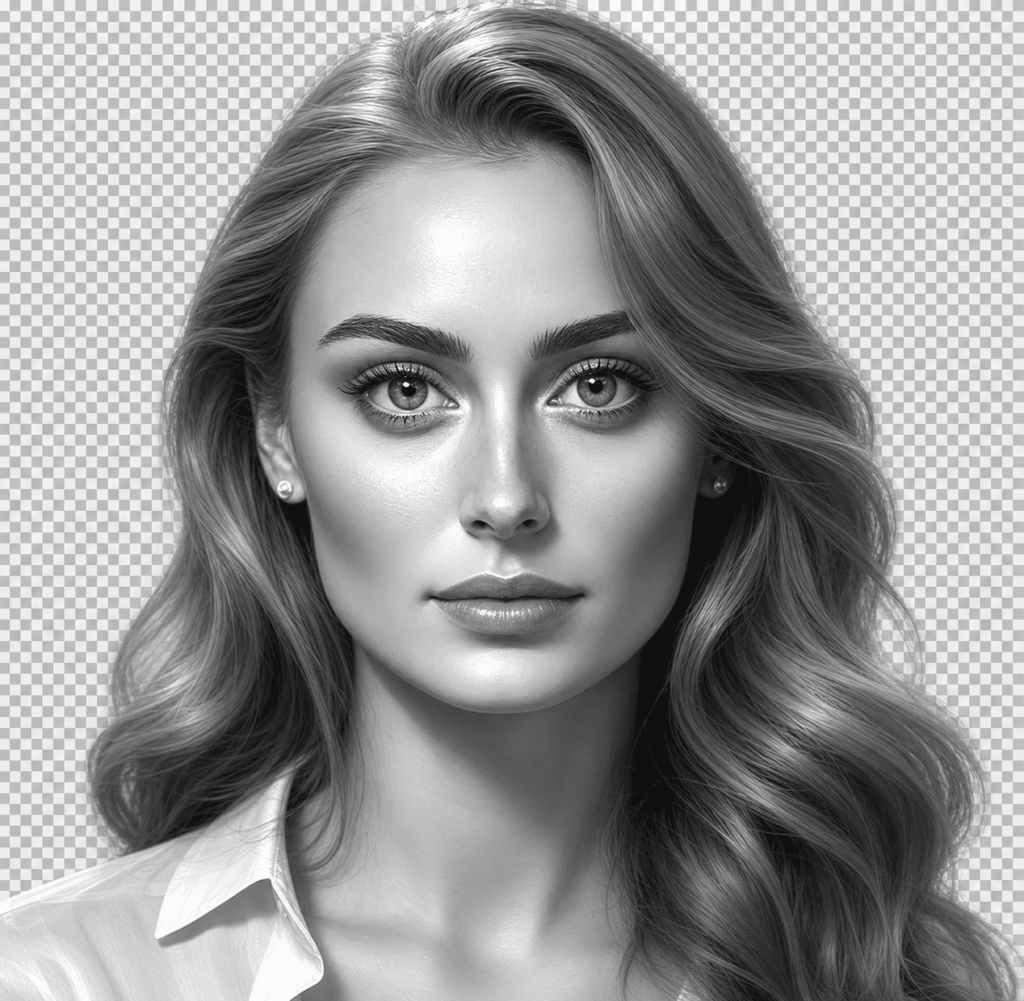
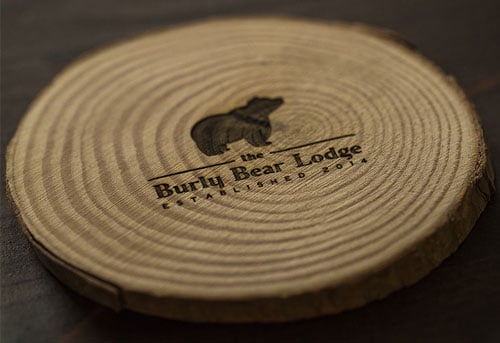
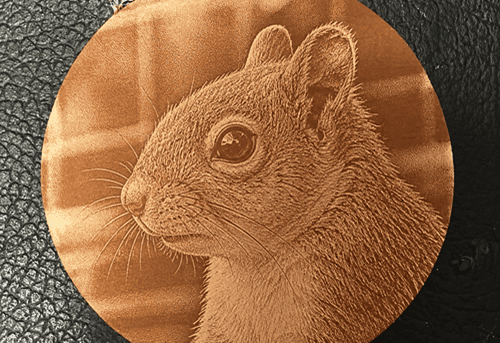
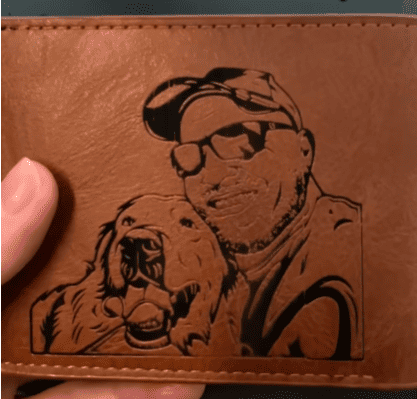
(Sample Adjusted Image)
Tips for photo laser engraving on leather
Focus Carefully
Make sure the leather lies flat and the focus does not shift during the job. You can glue the leather to a board if the leather is rapped for long.
Consider Light Moisture
Slightly mist the leather before engraving. This can reduce smoke marks and help the burn look cleaner.
Run a Test First
If possible, crop a small piece of the image and do test engraving for best settings.
Choose a Good Starting Setting as the Base, Then Test Nearby Values:
6w UV laser engraver: Dwell time: 270, DPI 420, Freq 65, Pulse 1.
40w CO2 laser engraver: Power 30%, Freq 10, Dwell time: 50
10W diode laser: Dwell time: 240; power: 100%; mode: grayscale DPI: 320
If the engraving is too light: increase Dwell time; increase power slightly; increase contrast in the image; Check focus
If the engraving is too dark or burnt: reduce dwell time; lower power; reduce DPI
The image looks muddy: Increase contrast in the photo; try grayscale instead of dithering; Reduce background clutter; or use lighter leather.
Best Laser Engraver for Leather Photo Engraving
Different laser types also affect final result you get on leather.
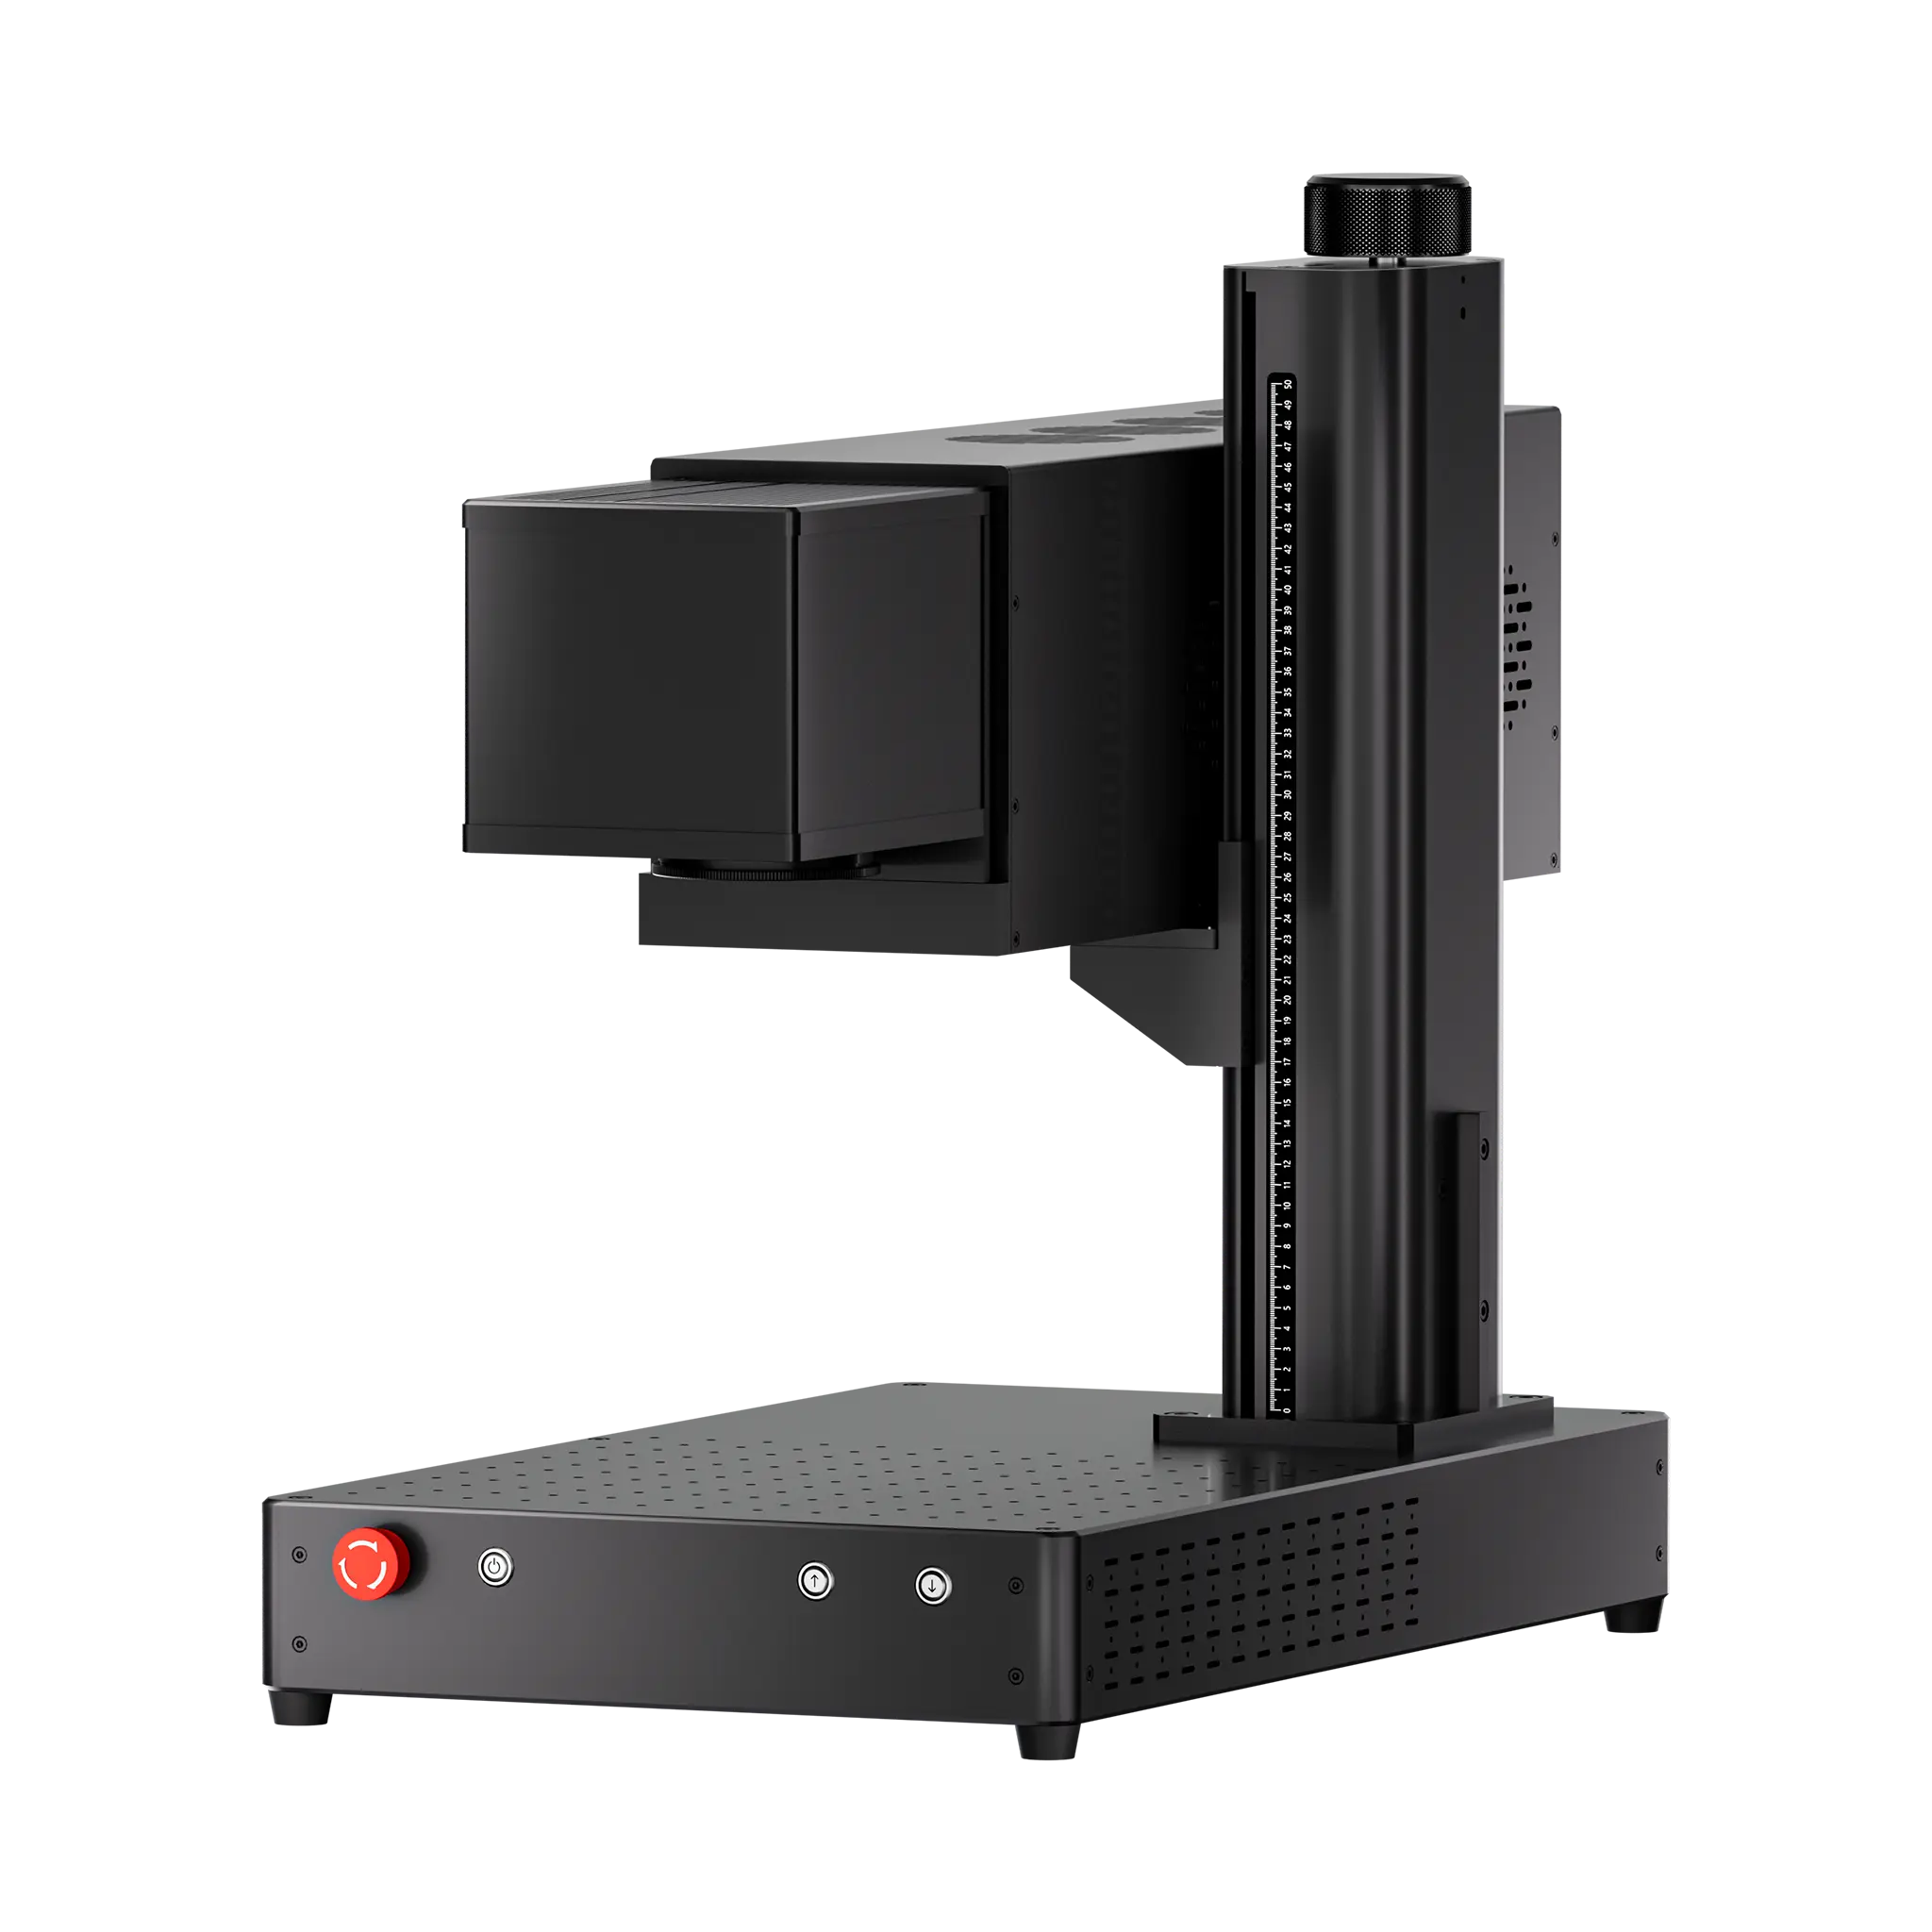
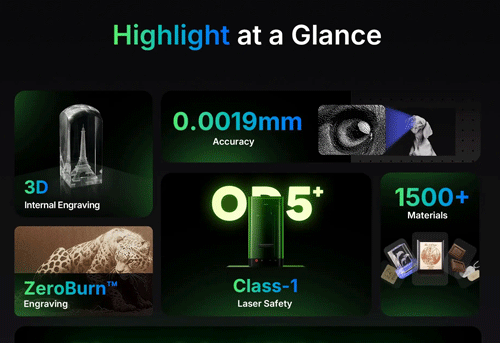
ComMarker Omni X UV Laser Engraver: The Best Choice for Leather Photo Engraving
• High-frequency pulses with 0.0019 mm spot size with precise dwell control and produces sharp, high-contrast 16K HD photo engravings even at high DPI
• Especially effective on PU leather and leatherette
• Creates cleaner, more print-like results with minimal edge melting
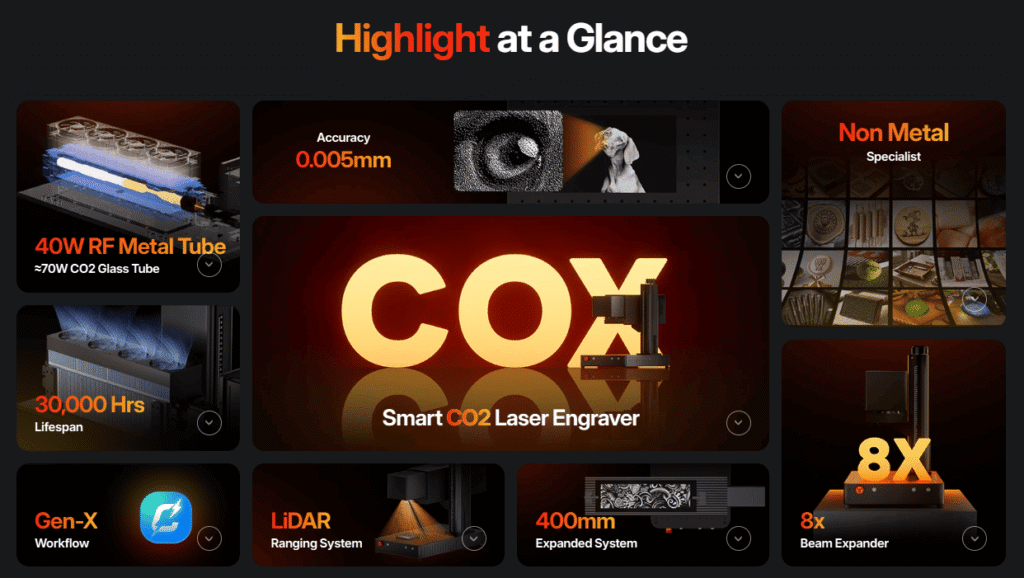
ComMarker CO2 Laser Engraver: Best for Fast Leather Production
• Leather-friendly wavelength with 15000 mm/s Fast engraving speed
• Produces warm, deep, vintage-style engraving effects
• Ideal for batch leather products and fast production work
• However, CO2 laser operates with high heat, so inreasing DPI makes the results look slightly burnt. This feature limits the precision CO2 laser can offer on leather engraving.
Diode and Fiber Lasers: More Sensitive to Image Prep
These laser systems can engrave leather photos but require more image and parameter tuning since they rely heavily on heat interaction with the leather surface. For better results, background removal, contrast enhancement, dithering, or switch to Sketch-style images will help.
For most users focused on leather photo engraving, UV remains the clear top-tier choice for its dark, high-contrast surface marking result.
Conclusion
Laser engraving photos on leather is all about balancing image preparation, material choice, and laser settings. Different laser types also affect final results. UV lasers produce the cleanest and sharpest photo results, CO2 lasers create a warmer vintage look, while diode and fiber lasers usually require more image adjustment and testing. With the right workflow, you can make leather photo engraving with a premium feel.