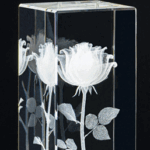
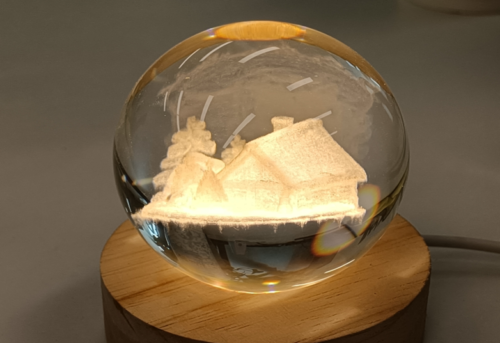
Glassware is a popular item for engraving, especially for custom gifts or promotional products. Whether it’s wine glasses, beer mugs, or decorative glass pieces, engraving glassware with a UV laser engraver produces high-quality and detailed results. Using the ComMarker R5 Rotary Chuck, you can easily engrave cups and ensure that the designs are crisp and well-aligned. Here’s a guide on how to engrave glassware with the Omni X/XE UV Laser engraver.
Step-by-Step Guide for Glassware Engraving:
-
Preparing Your Glassware:
-
Start by measuring the diameter of your glassware using a vernier caliper or ruler. For irregularly shaped glasses, use an average diameter to ensure proper size alignment.
-
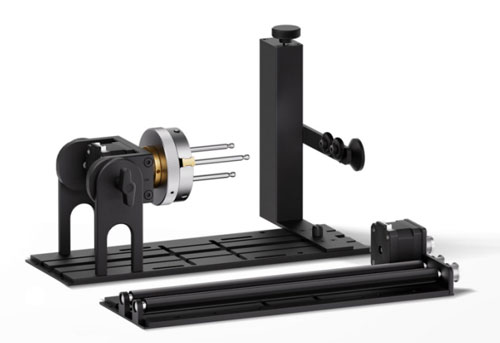
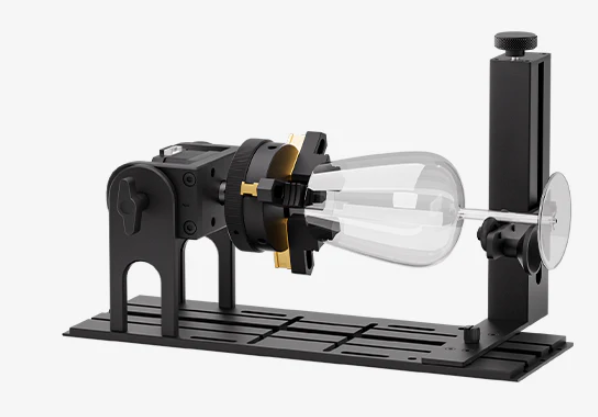
Place your glassware on the ComMarker R5 Rotary Chuck. Since glass is slippery, it can be hard to keep it in place, so securing the glass with glue dots on the chuck can help prevent movement.
-
-
Leveling the Glassware:
-
Use the spirit level to ensure that the engraving area is perfectly horizontal. Adjust the support frame and the rotary chuck to achieve a level position.
-
After placing the glass securely, rotate the chuck and adjust the screws on the stand to ensure the engraving position is level.
-
-
Setting Up in the Software:
-
Open ComMarker Studio and import the design you want to engrave. After importing the design, adjust the size and position according to the size of the glassware.
-
Rotate the design if necessary, and set the engraving parameters as needed. Refer to the ComMarker material settings PDF for specific adjustments based on the glass type.
-
-
Auto-Focus and Test Engraving:
-
Click the Focus button to initiate auto-focusing. Since glass focus can vary slightly, you may need to test and adjust the focus to get the sharpest engraving possible.
-
If the laser power is too weak, fine-tune the focus by adjusting the Z-axis up or down until the laser is at its strongest.
-
-
Previewing and Starting the Engraving:
-
Use the Preview function to verify the placement of the engraving on the glassware. This step ensures there are no alignment issues before starting the process.
-
Once you are satisfied with the positioning, click Start to begin the engraving process. For most glassware, a single pass will be sufficient, but thicker or more intricate designs may require additional passes.
-
-
Finishing Touches:
-
Once the engraving is complete, gently loosen the chuck and support the glass to prevent it from falling.
-
Clean off any dust from the engraving and inspect the design to ensure everything is engraved perfectly.
- Add paint for a premium finish.
-
More tips for UV laser glass engraving
Conclusions:
The ComMarker R5 Rotary Chuck makes laser engraving glassware easy and efficient, providing clear and precise results every time. Whether for personal wine glass business, branded products, or custom glassware for events, the ComMarker Omni X/XE UV laser engraver makes it all possible with minimal effort.