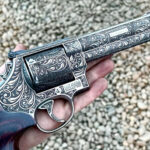
Challenge coin laser engraving, service/marriage anniversary medals, or achievement awards can be a profitable laser engraving service.
In this guide, we’ll show you how to laser engrave coins professionally using a fiber laser engraver, with detailed steps, settings, and qualified blank coins for engraving you can use.
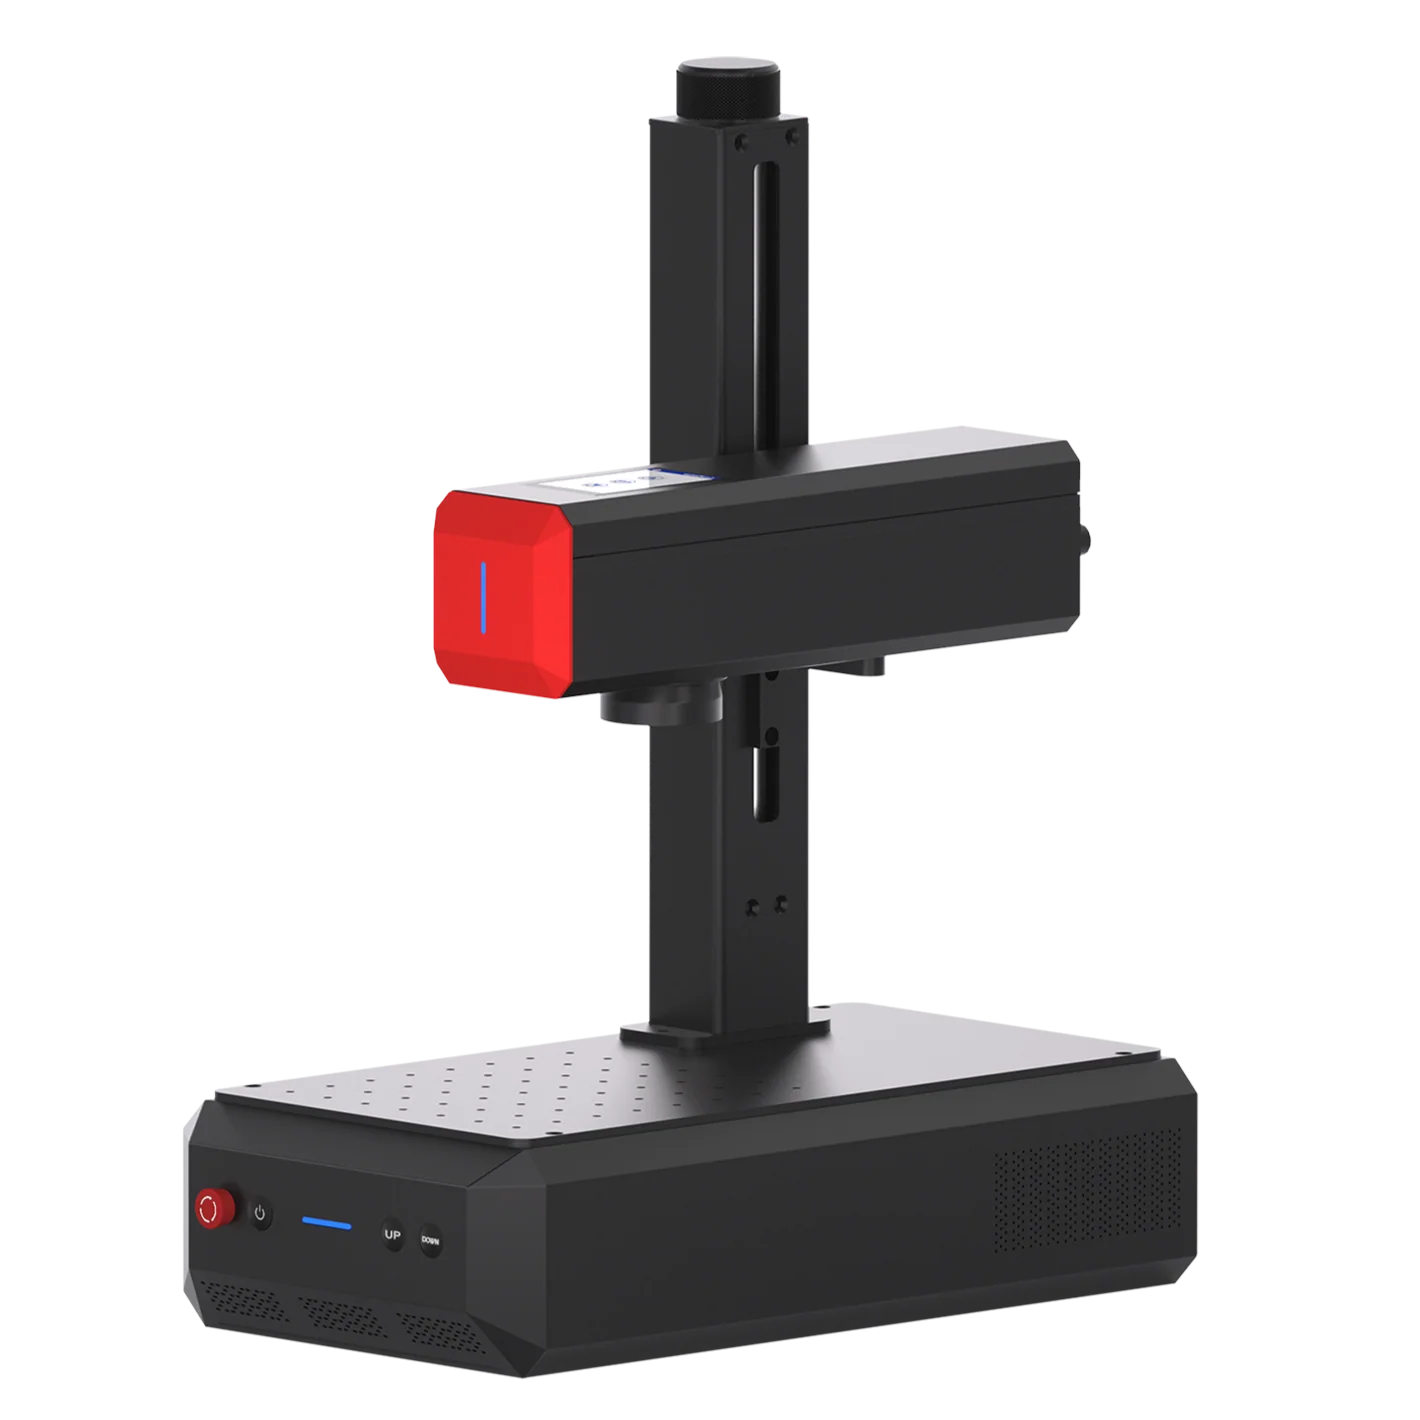
What Is a Fiber Laser Engraver and Why is it the Best Laser Engraver for Metal Coins?
A fiber laser engraver is a high-precision machine that uses rare-earth fiber to generate a powerful, focused laser beam for permanently marking and engraving metals and other materials.
It delivers high energy density, produces clean and precise details for laser depth metal engraving (3D engraving) and works exceptionally well on brass, steel, and other metals.
Steps to Laser Engrave a Brass Coin with a Fiber Laser Engraver
Machine Used: ComMarker B6 60W MOPA fiber laser engraver.
A 20W fiber laser engraver is also capable, while higher wattage allow faster production without sacrificing quality.
You can check out an introduction to different fiber laser engraver wattages and their metal engraving performance.
Coin blanks for laser engraving: ComMarker Metal Coin Blank 3mm
Step 1. Design the Depth Map
What is a Depth Map and Why its Best for Laser Engrave Coins
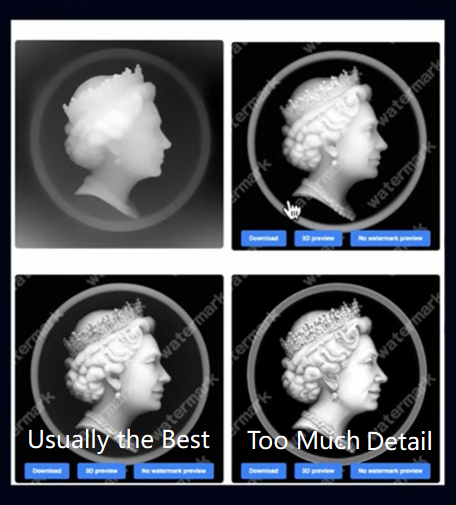
A depth map converts an image into grayscale layers for different engraving depths. The darkest areas means deepest engraving and the lightest areas means highest surface points.
A normal photo hardly offers the desired relief effect since the dark and light change is not clean enough for laser processing.
How to Create a Depth Map
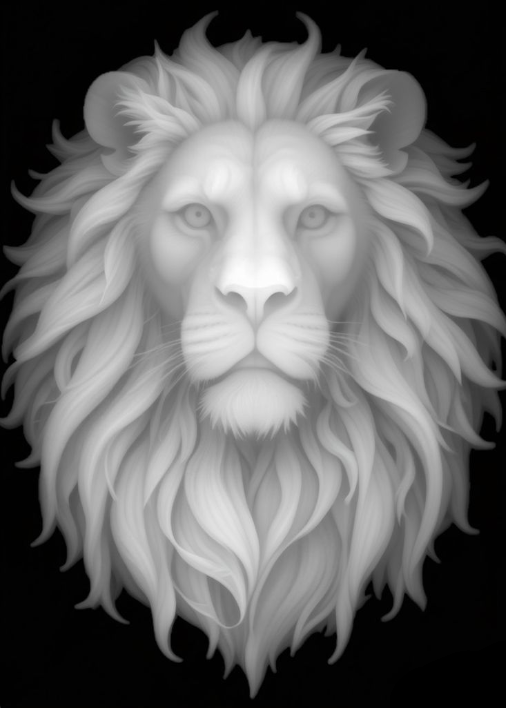
First, you need a reference image. You can use your own picture or create a relief’s picture with AI. Make sure the image has strong light-and-dark contrast and clearly defined details. This will help maintain depth and important details in the final result.
Next, generate the Depth Map. You can use SculptOK or ImageR
Then, remove the background before engraving.
Tips: Pick a depth map with high contrast to preserve more details for engraving.
Alternative Methods
1.Purchase ready made depth maps from Etsy or Google Images.
2.Convert a 3D model into a depth map.
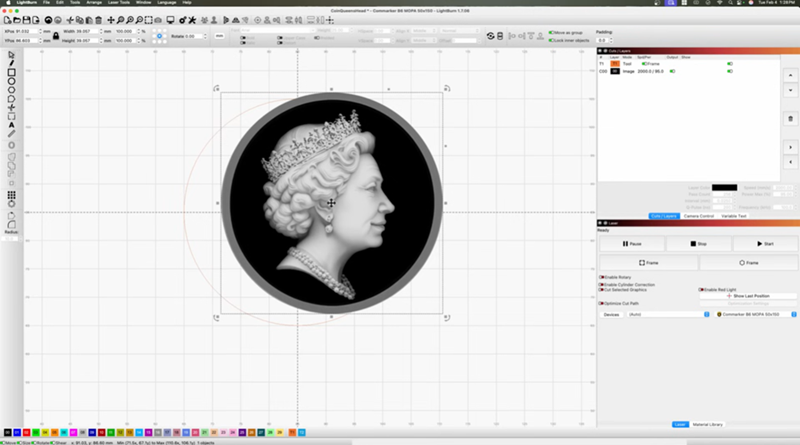
Step 2. LightBurn Engraving Setup
First, create a Positioning Circle
Draw a circle in the center of the workspace. This circle should matches the exact diameter of your coin which helps position both the coin and image correctly.
You can use LightBurn’s mask feature with your custom shape to isolate and engrave just the coin area.
Tip: If your coin has a raised outer rim, reduce the image size slightly so it doesn’t overlap the border.
Then, import the Engraving Settings
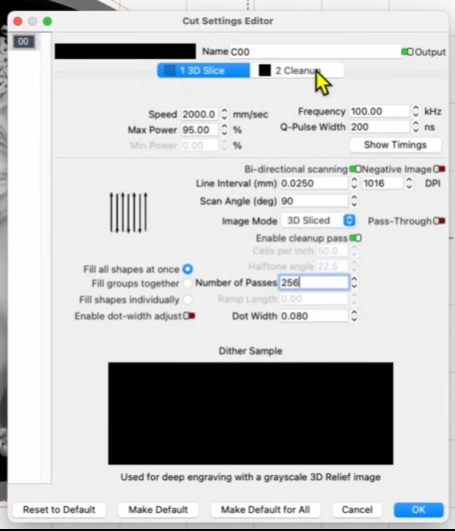
Quick Brass Engraving Settings for 60W ComMarker B6 MOPA (About 2 Hours)
Lens: 150mm
Set Image Mode to 3D Slice. This allows LightBurn to slice the grayscale image into layers and generate true depth engraving.
- Speed: 2000 mm/s
- Power: 95%
- Frequency: 100 kHz
- Pulse Width: 200 ns
- Line Interval: 0.025 mm
- Layers: 256
- Mode: 3D Slice
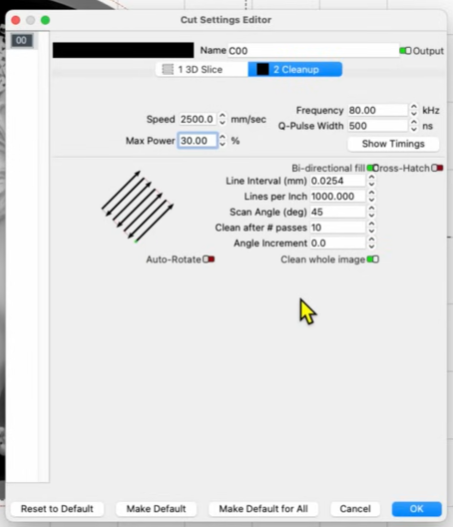
Cleanup Pass:
- Every 10 layers
- 30% power
- 80 kHz frequency
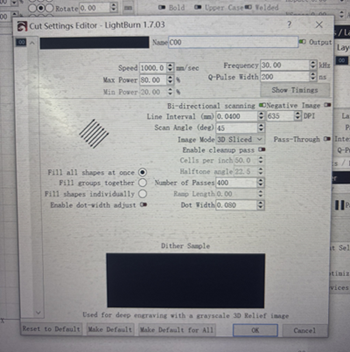
Deep & Detailed Brass Engraving for 60W ComMarker B6 MOPA (4 Hours-Recommended for Best Results)
Fewer layers result in less detail. Increasing the number of layers improves fine detail and depth quality.
Lens: 150mm
3D Slice setting:
- Speed: 1000 mm/s
- Power: 80%
- Frequency: 30 kHz
- Pulse Width: 200 ns
- Line Interval: 0.04 mm
- Layers: 400
- Mode: 3D Slice
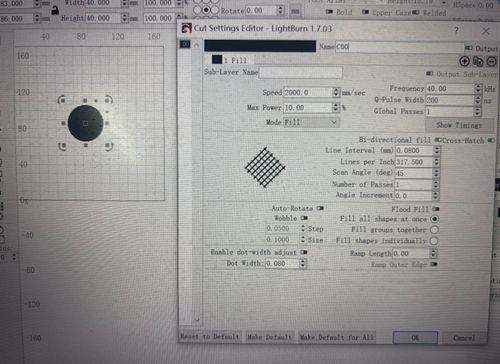
Clean up setting:
- Draw a filled circle in the software and engrave twice for extra depth.
- 10% power
- 40 kHz frequency
Settings for 20W fiber laser engraver (50 × 50 mm Aluminum, about 1.5 hrs)
- Machine Used: ComMarker B4
- Speed: 1000 mm/s
- Frequency: 30 kHz
- Power: 75%
- Line Interval: 0.025 mm
- DPI: 1000
- Angle: 45°
- Image Mode: 3D Slice
- Passes: 100
If you like, you can add names or custom designs directly in LightBurn.
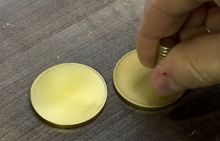
Step 3. Check the Laser Coin Blanks before engraving
Use a magnet to test your coin. Solid brass is non-magnetic. But if it’s highly magnetic, it likely contains iron. Also check if the thickness of the coin blank is enough before engraving. You can also Laser Cut Metal to make your own blank.
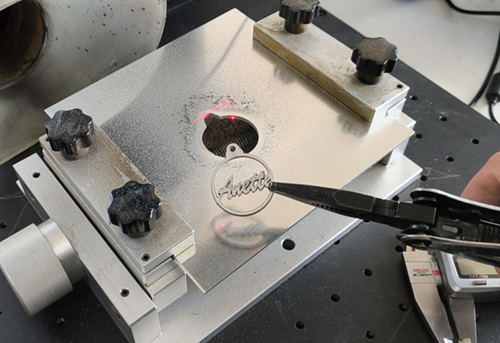
Step 4. Engraving Preparation
Adjust the focal distance to the optimal setting.
Preview and place the coin on a stainless steel sheet to protect your workspace if the beam goes over the edge.
Use small field lenses to get higher precision, and therefore better result.
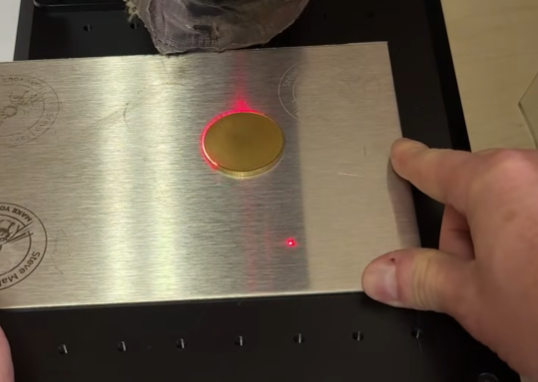
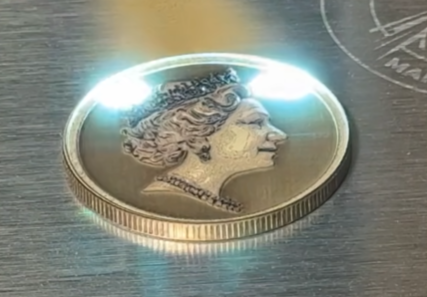
Step 5. Start Engraving
During the engraving process, periodically lower the laser head slightly to maintain optimal focus depth. Usually once per half an hour is recommended.
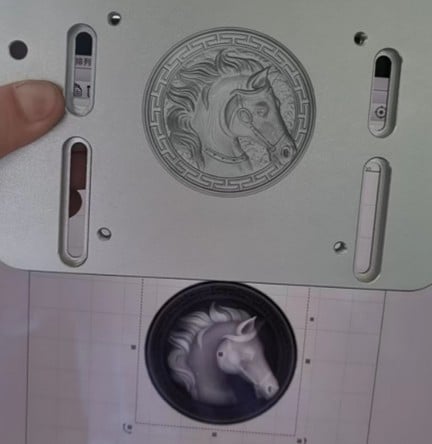
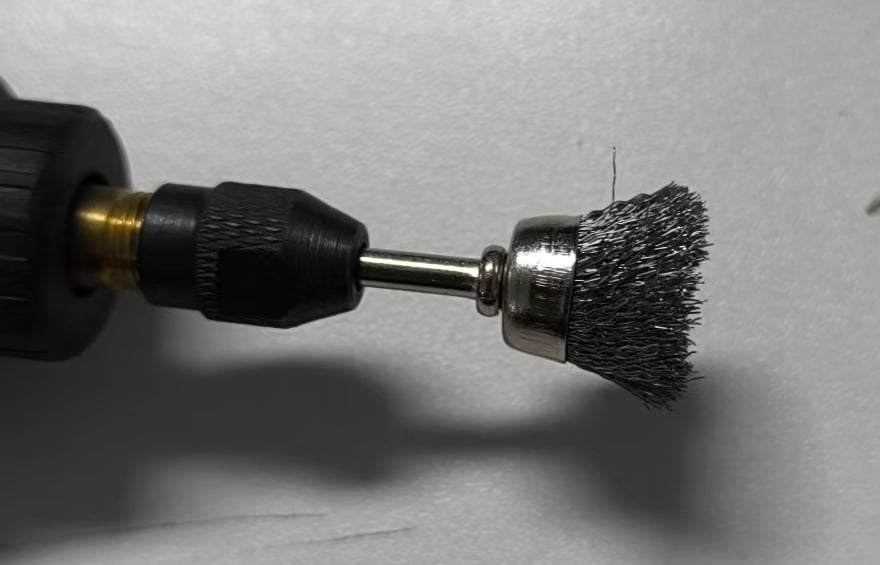
Step 6. Polish and Finish
After engraving, the laser surface will feel rough
You can polish using Sandpaper, Rotary grinding pen or a Polisher.
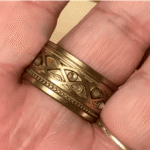
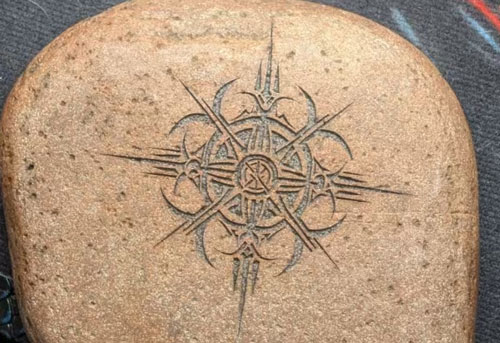
After cleaning the laser engraved coin, the depth becomes more visible and the coin looks professional and premium.
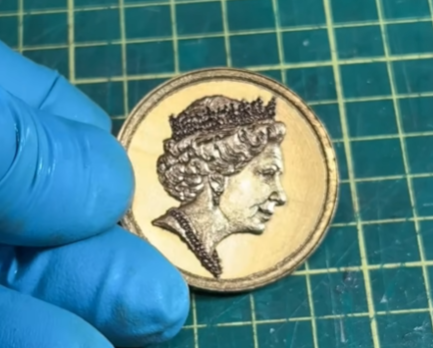
To make it look antique, apply brass black solution for an aged, antique finish.

Final Tips: How to Sell Laser-Engraved Coins
If you’re planning to sell laser marking coins, check this guide for the Best Platform to Sell Laser-Engraved Products.
But be careful when you are engraving logos or branded designs. Always ensure you have proper authorization before selling trademarked content.